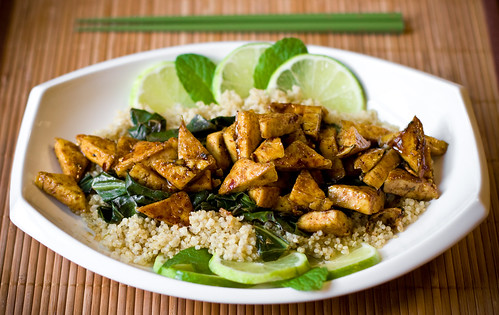
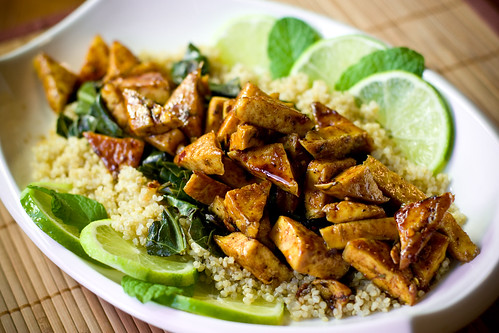
Sweet Chili Lime Tofu with Wok Steamed Collards and Quinoa
I’ve been thinking recently about the five flavors that many thai dishes revolve around: hot, sweet, salty, sour, and bitter. I wasn’t necessarily looking to create a thai dish, but a dish that balances those five flavors without being overly complicated. I’m really pleased with the result; tofu so easy to prepare you won’t mind whipping it up after work. And this recipe also has no added fat! It certainly has a good deal of sugar and salt, but hey, old habits die hard.
If you’ve read my blog for any length of time, you’ll probably realize that this recipe falls within the basic equation for my favorite meals: flavorful tofu + dark leafy green + grain/rice/pasta base. I love this combination because it’s easy and super customizable depending on what you have on hand. I use collards greens and quinoa in this recipe, but feel free to use spinach, kale, mustard greens, chard, arugula, chinese broccoli, cabbage… whatever for the greens, and wheat pasta, rice, millet, rice noodles, barley, orzo etc. for the base.
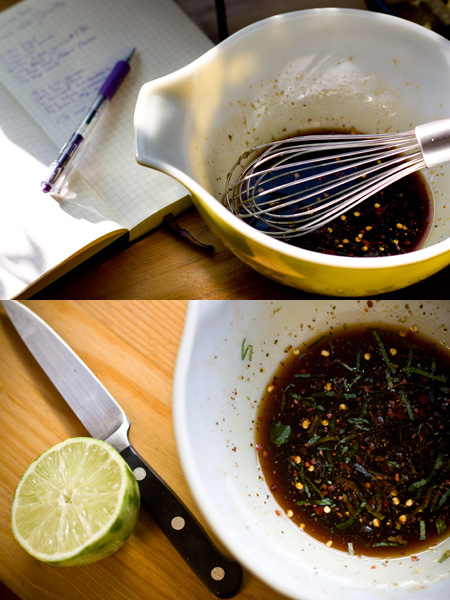
 A sauce can make or break a dish. This sauce is easily whisked together from a few simple ingredients. It’s super duper flavorful, and added to a smoking hot pan full of tofu, it turns into a delicious glaze. I think you’ll be surprised at how easy it is to create a restaurant quality glaze at home. The glaze, combined with the greens, creates the five flavors I was blabbering about:
Hot: Red Chili Flakes
Sweet: Sugar
Salty: Tamari
Sour: Lime Juice
Bitter: Collard Greens
Sweet Chili Lime Tofu with Wok Steamed Collards and Quinoa
Serves 2-3
1 Block Tofu, extra firm, 14 oz
Sweet Chili Lime Sauce
3 Tbs Sugar
3 Tbs Reduced Sodium Tamari (or soy sauce)
1 3/4 Tbs Fresh Lime Juice
1/2 Zest of the Lime
1/2 tsp Red Chili Flakes (or 1-2 fresh hot chilies, minced)
1 Clove Garlic, pressed, optional
1/4 tsp Salt
4 Mint Leaves, chiffonaded
Quinoa*
3/4 Cup Quinoa, rubbed/rinsed in cool water, drained
1/2 Zest Lime
2 Bruised Cardamom Pods, optional
1 Tiny Stick of Cinnamon (a broken piece of a larger stick), optional
1/4 tsp Salt
1 1/3 Cup Water
*Other options: For brown rice, adjust water to 1 1/2 cups, for medium/long grain rice, water measurement is the same. Noodles can be boiled, drained, and given a light splash of soy sauce and lime juice for some background flavor. The tofu is very flavorful, so whatever base you choose, it needs only subtle additions, if any at all.
Wok Steamed Collards
1 Bunch Collard Greens, middle veins removed, washed
2-3 Tbs Water
1 Pinch Salt
1 tsp Lime Juice
Directions
Combine all the ingredients for the quinoa in a pot that has a tight fitting lid. Bring to a boil, then cover and reduce heat to low. Cook for 20 minutes, then turn off heat. Do not open lid. Let steam for 10 minutes before serving.
Prepare the sweet chili lime sauce by whisking all of the ingredients together until the sugar and salt is dissolved.
Drain tofu and cut it into small triangles. I slice the block into 8 rectangles, then each rectangle in half to make two squares per rectangle. I cut each square diagonally to make four triangles per square. Tofu geometry is my favorite kind of math! You can cut the tofu however you please, but a thinner, smaller shape will work best for this method.
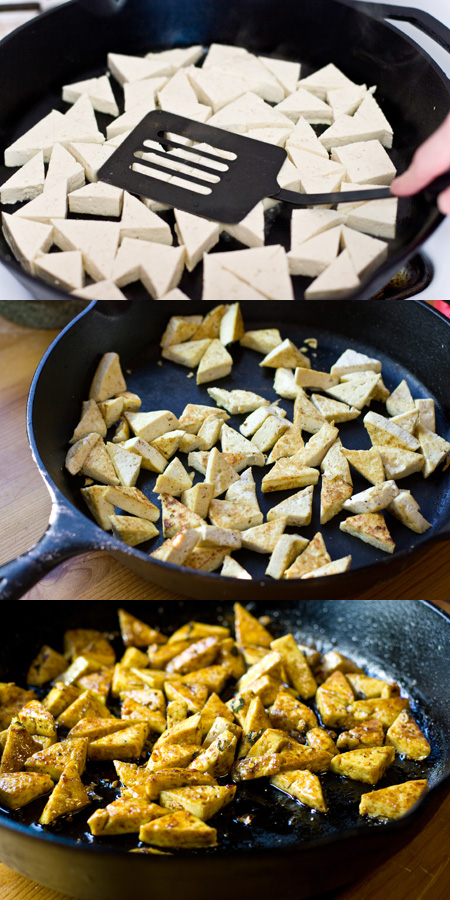
Heat a well-seasoned cast iron or non-stick skillet over medium heat. A 10″ skillet will fit all the tofu, so if you’re using a smaller skillet, you’ll need to do this in batches. In order to properly “dry fry” the tofu, you’ll need a pan the tofu won’t stick to even without any oil.
Spread the tofu out in one layer in the pan. Using a spatula, press the tofu. The liquid will squeeze out and boil away, and the tofu will begin to turn golden. The more water that evaporates, the sturdier the tofu will be, so be gentle at first to prevent the tofu from breaking up. After several minutes, flip the tofu over and press the other side. After about 10 minutes of dry frying, you can turn off the heat and set the tofu aside for finishing later, or proceed to adding the sauce. (You might want to set the tofu aside before finishing in order to to prepare the collards, below.)
To finish the tofu, bring the pan back up to temperature if it’s not already very hot. You want to heat the pan and the tofu over high heat, making sure the tofu is hot all the way through. Add the sauce and stir to coat the tofu. Turn off the heat. The sauce will bubble up, reduce, and form a glaze. If it isn’t bubbling up and forming a glaze, turn the heat back on high and cook until the glaze is.. well.. glaze-y.

Stack the collard leaves on top of each other, 3-4 at a time, and roll. Slice the roll in 3/4 inch segments. Run your knife through the chopped collards to make smaller pieces, then add them to a wok with the water, lime juice and salt. Cover with any lid that will contain the collards and cook over high heat for 3-4 minutes until the collards are steamed and tender.
For plating, arrange the collards atop of a bed of quinoa. Add tofu over the top, drizzling any leftover sauce over the dish. Garnish with lime slices and mint leaves. Serve.