Poolish Focaccia
I’ve baked bread for four days straight. In fact, the only reason I’m not baking today is, well… I ran out of flour.
I’m not exactly sure what came over me. I’ve always liked baking bread, but I usually only do it a few times a year, and I never spent too much time thinking about it. Make the dough, put it in the oven, and eat, right? And it might not be the best bread ever, but unless I really messed it up, fresh bread is always edible, even if it’s not exceptional.
But I started thinking about bread, and whole grains, and I decided to buy a grain mill. So I can grind my own flour. Thank goodness I live on the third floor of a house in a city with no yard or I might try to grow my own wheat. Somehow I don’t think the second bedroom is up to the task.
To prepare for the mill (It’ll be three weeks or so before it arrives), I finally purchased the two books I’ve been coveting for a while: The Bread Baker’s Apprentice, and Whole Grain Breads both by Peter Reinhart. I’ve been working from the former over the past few days. I figure I should get comfortable with white flour before I move on to whole wheat. I must say, I’ve been more than delighted. These books will be–and already are–indispensable. If the idea of being a HUGE breadgeek who makes the tastiest baked goods in town is appealing to you, definitely drop $40 on these two beautiful, huge, detailed hardbound books.

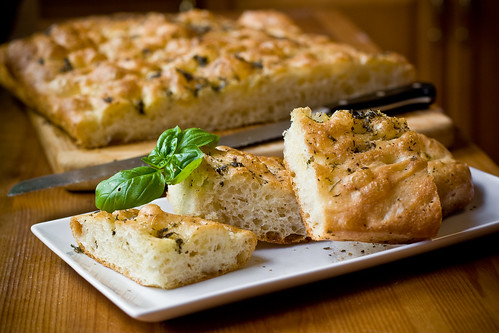
I’m going to share the Poolish Focaccia from Bread Baker’s Apprentice with you, because it’s one of those breads that isn’t that hard, but involves enough new skills for a green baker without being over-challenging. It does require a lot of time to make, but if you’re looking to expand your baking skills, and have a LOT of really tasty, perfectly golden brown, deliciously herbed focaccia when you’re done, than this recipe is for you! It’s a perfect weekend project.
I’m going to share a ton of photos, so before I get bogged down in the details, here’s the overview:
Day One: The night before baking, you make the poolish. All this requires is mixing flour, water and yeast and letting it ferment on the counter for a few hours, or even overnight. You can make focaccia without this step, but I think it gives it extra flavor, and it’s a good trick to learn for other breads. Taking a few minutes to do this before you go to bed really gives a great boost to your bread the next day. You can make the herb oil on either day.
Day Two: Mix the poolish with flour, water, salt, oil and yeast to make the dough. Turn the dough out on the counter and fold it. You’ll fold the dough three times, with rising in between foldings. After the dough has risen, you plop it onto a baking sheet and shape it, let it rise, then shape again before baking. A generous total time estimate would be 4-5 hours, but most of that is rising time.
Poolish
2 1/2 Cups (11.25 oz) Unbleached Bread Flour
1 1/2 Cup (12 oz) Water, room temperature
1/4 tsp Instant Yeast (Like RapidRise)Poolish Focaccia
3 Cups (20 oz) Poolish
2 2/3 Cups (12 oz) Unbleached Bread Flour
2 tsp Salt
1 1/2 tsp Instant Yeast (RapidRise, for example)
6 Tbs (3 0z) Olive Oil
3/4 Cup (6 oz) Water, 90-100º F (lukewarm)
1/2 Cup Herb OilHerb Oil
1 Cup Olive Oil, warmed to 100º F (ish)
Any herbs, 1/2 Cup fresh chopped or 2-3 Tbs dried, or a combination
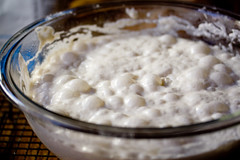 The Night Before: Make the poolish. With a wooden spoon, mix the ingredients together until all the flour is hydrated, and you’ve got a smooth, sticky mass. It’ll look like very thick pancake batter. Cover with plastic wrap. You can leave it out on the counter for four hours and then refrigerate, or leave it out all night. I left mine outside overnight where it was warmer than the fridge, but cooler than the house, so the poolish would have a nice, steady but slow ferment. Either way, it should be nice and bubbly after fermenting, like the photo on the left. It will have a super cool springy/stringy/stickty consistency, too.
(You can also make the herb oil this same night: Mix the herbs with the warmed oil. Turn off the heat and let the herbs infuse the oil at room temperature. The oil can also be made the next day, and this is noted later on in the directions.)

Make the Dough
If you refrigerated your poolish, take it out and let it sit for an hour to warm up. Once warm, it’s time to make the dough.
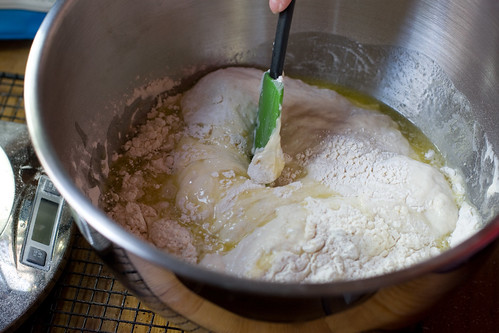
Mix the flour, salt and yeast together in a large bowl (or in the work bowl of a stand mixer). Add the poolish, water, and oil. It’ll look something like this:
If mixing by hand, mix to combine all the ingredients and then get in there and beat the hell out of it for 10 minutes. The book suggests 3-5 minutes, but it took me longer. It’s done when the dough is smooth, crazy sticky, willing to pull off the sides of the bowl but not the bottom, and your arm aches. This is what it looks like halfway through mixing – here it’s still rough and bumpy. It’ll be too wet to knead.
If mixing by machine, start with the paddle attachment to combine at low speed for 2-3 minutes, then switch to the dough hook. Beat at medium speed for 5-7 minutes. The dough should clear the sides of the bowl but stick to the bottom. Add more flour or water if needed to achieve this.
Stretch and Fold
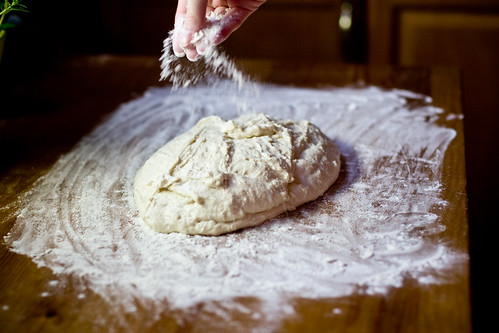
Prepare a bed a flour on your work surface. Scrape the dough out of the bowl onto your flour bed. Sprinke the top of the dough with flour.
Pat the dough into a roughly rectangular shape. The patting serves three purposes: it pushes the dough out into a rectangle, distributes the flour over the top, and removes excess flour. There should be enough flour that the surface of the dough is no longer sticky, but just enough to accmplish that. Patting removes the excess. Let the dough rest for 5 minutes.
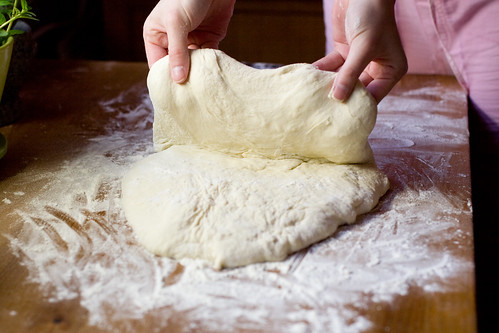
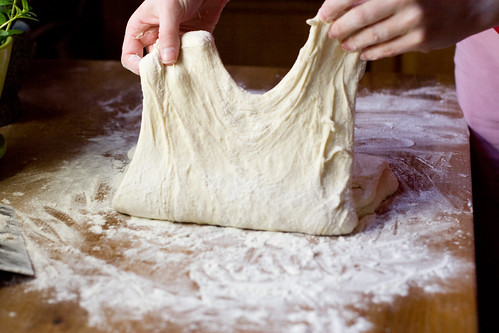
Now you’ll be folding the dough like a letter. Pick up one side of the dough. As you do this (it’ll be hard to hold on to, do the best you can), stretch the dough out and fold it over towards the middle. The quicker the movement, the easier it will be. If the dough is sticking to the table, no worries. Use a dough scraper to lift up the edges of the dough to put more flour underneath, seen here.
Repeat with the other side, again, just like you’re folding up a letter.
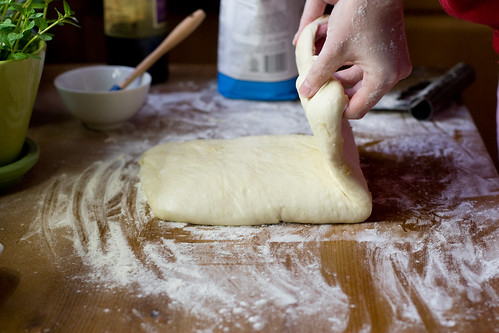
The dough, having been folded in thirds, looks like this. The dough should stay about the same dimensions after each fold. You’re not folding it into smaller and smaller rectangles, but stretching the dough out and then folding it back in on itself to make similarly sized rectangle. If that makes any sense?

Brush or spray the dough with oil, cover in plastic wrap, and let sit for 30 minutes. You’ll the fold it again, oil, cover, let sit for 30 minutes, then fold it a third time. Each time you fold, the dough will be easier to work with, a little firmer, a little neater. Fold in the opposite direction then the last. For example, if you folded left to right, the next fold will be top to bottom. This is the second fold:
Rising and Shaping
After the third fold, let the dough sit covered on the counter for 1 hour. The dough will rise, but not necessarily double in size. If you didn’t make it the night before, you can prepare the herb oil during this rise. Mix the herbs with the warmed oil. Turn off the heat and let the herbs infuse the oil.
Prepare a 17 x 12″ baking sheet (with sides, like a jelly roll pan) by placing a layer of parchment paper down across the bottom. Oil the parchment.
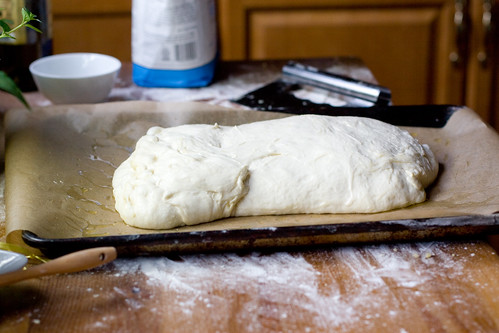
As best you can, move the dough from the counter to the baking sheet, trying to maintain the rectangle shape. Don’t worry if you can’t get a clean move, the dough is soft and unwieldy, so just move it the best you can.
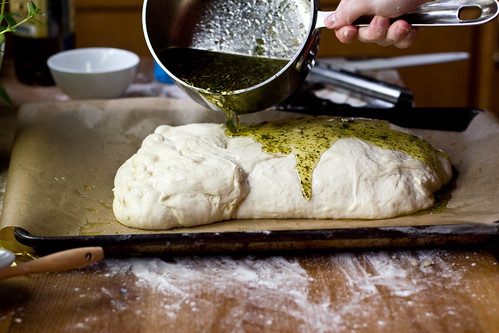
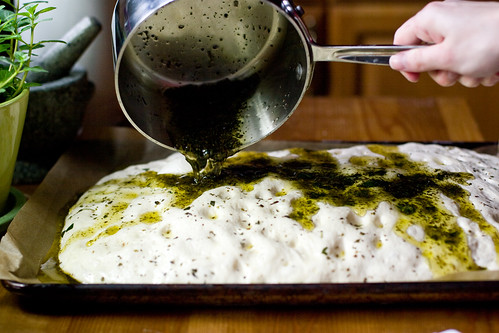
Pour about 1/4 Cup of Herb Oil over the top.
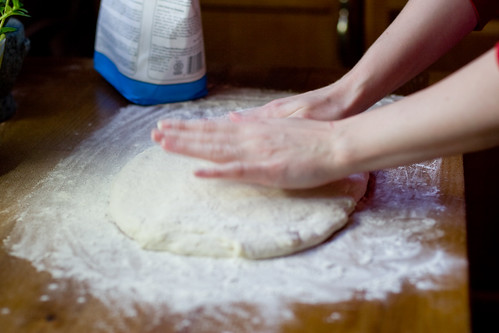
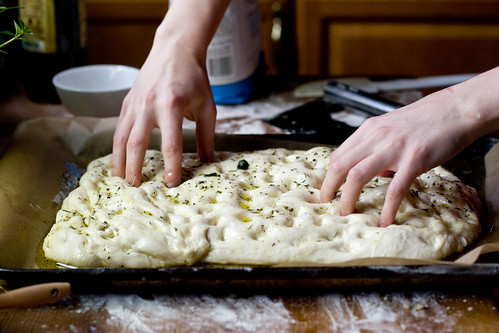
Using only your fingertips, begin to press into the dough to distribute the oil and flatten the dough out. The dough will gradually spread out in the pan, but don’t worry if it doesn’t fill the pan, it’ll get there after rising again. Just remember that you’re only allowed to use your fingertips, pressing down. You want to keep the majority of the air bubbles that have been forming in the dough all this time, so kneading or pressing the dough flat with your hands would destroy all your hard work.
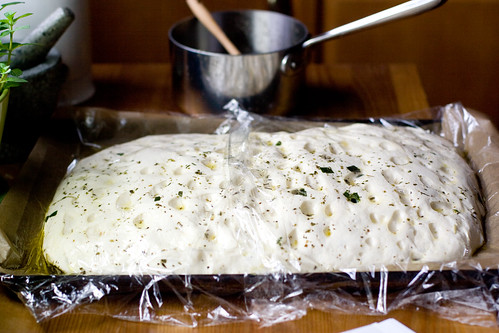
Make sure the dough is completely covered in oil, then cover and let it rise for two hours. It will be very puffy, and if it hasn’t completely filled the pan, it’ll be close to doing so. Nearing the end of this rise, preheat the oven to 500º F, making sure the rack is in the middle.
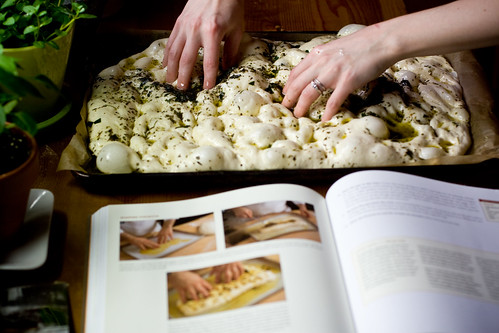
Add another 1/4 cup, or more, of the herb oil.
Spread the dough out to its final size using the same fingertip technique as above. You’ll see all sorts of fun bubbles! You want an even distribution of bubbles and fingertip dimples. You might want to break any huge bubbles since they’ll just explode in the oven anyway. Sprinkle the top with salt as desired.
Baking
Let the dough rest for another 10-15 minutes. Place the dough in the oven, and turn the temperature down to 450º F. Bake for 10 minutes, rotate the sheet for even baking, then bake for an additional 10-15 minutes until golden brown. If you have an instant read thermometer, the dough should be 200º F in the center of the pan.

 Cooling and More Ideas
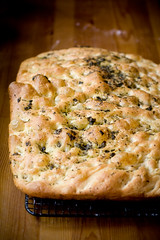
When the focaccia comes out of the oven, remove it from the pan and place it on a cooling rack. Let the focaccia cool for at least 20 minutes before gorging yourself.
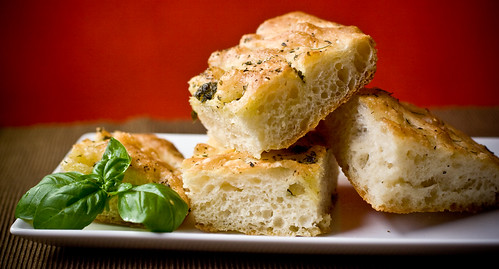
Feel free to top your focaccia with other things besides just herbs! Olives are nice, as well as sliced onions, garlic… I’ve seen sweet focaccia with grapes or apples and cinnamon and sugar… the possibilities are endless. Depending on the topping, you may want to add it in the last five minutes of baking to ensure it doesn’t burn.
Enjoy your ridiculously huge loaf of focaccia. Bring one to the next party you attend and you’ll be everyone’s favorite person.
I did it, following the “off” technology.
I added olives and onions from deliaonline.
Fantastic.
Thank you!
Great recipe.
Thank you Lolo! I love this book but your pictures and tutorial helped me through. It seemed so intimidating before. This is actually the forth or fifth time baking this focaccia and I always check in with your step by step photos to make sure everything is shaping up the way to should be….
Anyway, this time the bread filled the pan completely and I popped it into the oven, so excited to eat the rewards of my labor, but minutes my kitchen filled with black smoke, billowing out into my living room and all smoke alarms started going off! The oil had spilled over the side of the pan and I nearly escaped the dreaded oven fire! I am totally amazed b/c I decreased the oil in half this batch!
Worse yet, my focaccia was doomed! I took it out, turned off the oven, opened all windows, added salt to the oil spots. Once the oven was cool enough I scraped off the oil and salt, now more like black goo out and preheated the oven again, watching for any smoke. I put the bread back in the oven, this time lined with tinfoil! I hope it turns out! Nothing will stop me from trying to salvage this loaf, it smells so good already even through the smoke!
I made foccacia a few times in culinary school. we used a slightly different technique. Instead of using flower to do the folds we put oil on our hands to smooth it out and then folded it.
Also, If you wanted to cut your rising time in half you could use your oven as a proof box.
All you have to do is turn your oven on warm and leave the door open. putting a bowl or pie tin of water helps too. Just make sure you cover your bread with sprayed plastic wrap between rising! It goes by super fast and you don’t want it to dry out or stick.
Hi,
Just stumbled across your site. Your foccacia looks beautiful. I haven’t made it yet, but I JUST finished making the Christopsomos out of the same book. Waiting for it to cool now. Have you heard about the Bread Baker’s Apprentice Challenge to make one bread/week from the book? It’s apparently too late to join officially, but it was started on pinchmysalt if you want to check it out. I was definitely hooked by the idea, and if you’ve made bread everyday for the last four days and even have your own mill on the way, you might be tempted as well.
Happy Baking!
Katie
p.s. Are the two books very different? I was really excited about the multigrain one and thumbed through it really quickly in the bookstore the other day. The pages I happened to open up to were already in the apprentice book.
I’m baking this now and my house smells HEAVENLY!
just made this today and it is wonderful! Love your pictures. thank you : ) Someone asked about Active Dry Yeast – that is what I used, in the same proportions and it worked just fine.
I topped with caramelized shallots in the last couple minutes of baking. Yum!
I’ve been wanting to make this bread so bad, but since I don’t have the book I couldn’t make it. I didn’t know what the poolish recipe was. :) Now I do. Thanks for posting it! I’ll be making this soon.
Your foccacia looks absolutely beautiful! I’m a foccacia lover for years and always wanting to make it at home since the only place that I had a great foccacia was about 15 years ago inn California, at a small, local restaurant. Ever since then, no other place offered good foccacia bread!
I made this bread using a recipe from Joe Pastry site a few days ago and baked it last night. Mine turned out just ok. My main problem with this bread is when I mixed the poolish with the flour the next day – the dough didn’t seem to rise properly. It risen just about an inch and that was about it. I’m still not sure how to fix it but I guess I’ll have to make it again!
Thanks for posting and for sharing this wonderful recipe – I’m sure lots of people do appreciate it!
This was my first time making focaccia and your recipe is wonderful! By far the best bread I’ve ever made. Thank you!!
wow this looks amazing!