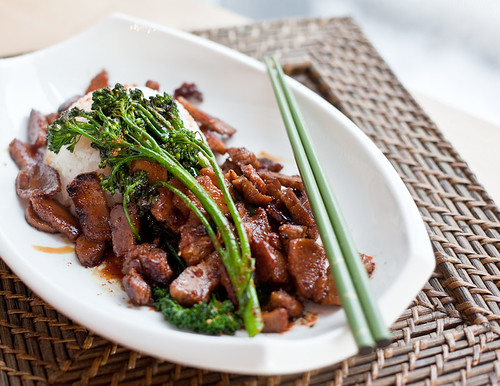
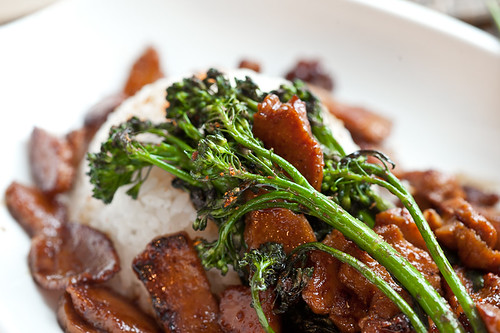
Seitan and Broccolini with Clementine Teriyaki

So how about we get this yummy vegan train back up and running again? Let’s talk teriyaki.
This isn’t a real teriyaki sauce, but it’s definitely inspired by one. Teriyaki sauce is one of those things that is really easy to make at home successfully, so if you’ve been going without or buying expensive bottles of the stuff, you can stop! It literally has three ingredients, but you can obviously get fancier with it if you like.
Soy Sauce
Sugar
Mirin or Sake
That’s it, people. Mix, reduce over heat, and eat up.
So this sauce isn’t really a teriyaki sauce because I use rice vinegar instead of mirin. Mirin is a sweet, thick rice wine that’s very commonly used in Japanese cooking, but I happen to be out of it at the moment. I’ve found that rice vinegar makes a good substitute (though not 1:1, necessarily), and can be much easier to find in supermarkets.
I’m not sure if this is a common substitution or not, and perhaps people familiar with Japanese cooking would screw up their face at the idea, but it works. And it’s tasty. So there you have it.
I also added clementine zest and juice to my teriyaki sauce. I love the sweetness and the bright citrus note it adds to the dish. I think any citrus you have would work here, and you can even leave it out altogether if you like (sub water for the juice, add a little more sugar if you like).

It’s winter, and it’s high season for clementines. If you haven’t already picked up one of those enticing wooden crates full of them at the supermarket, I encourage you to do so. They are sweet, seedless, easy to peel, and all-around amazing. You will finish the entire crate, I promise you. And if not, now you have a recipe to use some of them in. And if you still have leftovers, send them to me.
As with most of my recipes, this one is pretty flexible. I used broccolini because I LOVE the stuff, but regular broccoli, asparagus, or your favorite veggie will stand in nicely. I served this with sushi rice, but noodles would be welcome. The seitan is perfect here, but tofu or even tempeh would be lovely as well. Orange juice will cover for clementine. This is a great recipe to adapt to use your favorite ingredients, or at least the ones you have sitting in your fridge at the moment.
If you like, add some sesame oil, or garlic, or ginger to the sauce. I love it how it is, and appreciate its simplicity, but this sauce can be used more as a base sauce you can embellish any which way you like.
Seitan and Broccolini with Clementine Teriyaki
Serves Two
8 Ounces Sliced Seitan (I use West Soy brand)
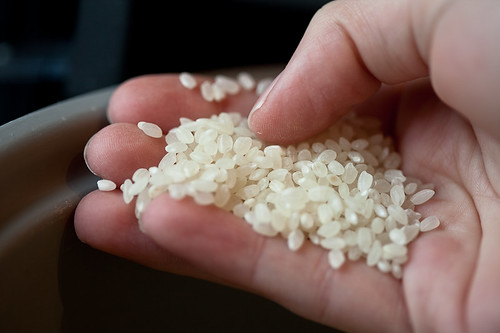
1 Cup Sushi RIce
6-8 Stalks of Broccolini
2 Clementines
1 Tbs Vegetable Oil
Japanese Seven Spice, optional
Clementine Teriyaki Sauce
1/2 Cup Low Sodium Tamari
1/3 Cup Light Brown Sugar
1/3 Cup Fresh Clementine Juice
1/4 Cup + 1 Tbs Rice Vinegar
1/4 Cup Water
Zest from 1 Clementine
Rinse your sushi rice in cool water and drain. Cook in your rice cooker or on the stove according to package directions, but 1 cup of sushi rice is usually cooked in 1 1/4 cups of water. Allow to cook completely and steam for 5-10 minutes off the heat while you are preparing the rest of the meal. Total cooking time for the rice will be around 20 minutes.
Mix all the sauce ingredients together in a small pan let it go at a lively simmer for 20 minutes, until reduced and slightly thick. The sauce will NOT be super thick when it is hot. It will very slightly cover the back of a spoon and look syrupy, but it’s not going to be thick until it cools, so don’t worry if it seems runny. At the end of the cooking you should see large, excited bubbles (this is the sugar caramelizing), so if you don’t see those, keep cooking. Once the sauce is done, it’ll taste good but pretty strong. Set aside.
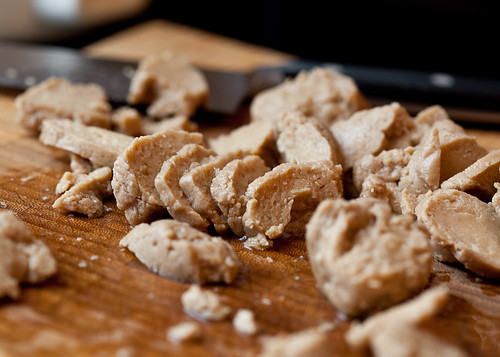
While the sauce and the rice are cooking, prepare your seitan and broccolini. Slice the seitan into 1/8″ thick medallions, or something similar. I usually don’t prep broccolini any more than rinsing it and chopping off the ends, but if the stalks are particularly thick, you may wish to half them lengthwise. This shouldn’t be the case with most bunches you find in the store, however.
Heat a large non-stick or cast-iron skillet over medium high heat. Add the seitan and let brown on all sides, about 5 minutes. Remove to a bowl, turn up the heat to high, and add broccolini in one layer. Once you get color on one side, flip, reduce heat to low, and cover the pan to finish the cooking, another 2-3 minutes. The broccolini should be bright green and cooked to a tender-crisp.
Once you are ready to serve, add the seitan to the pan with the broccolini. Drizze enough teriyaki sauce in to coat everything. Beware, if the pan is too hot you risk burning your sauce, so take good care here. Once everything is heated and covered in a nice glaze, serve immediately with the sushi rice. Top with seven spice if you like a little heat.
This sauce is strong so you just need enough to coat — save any extra for a future meal.