Blackened Tomato Canapés

Blackened Tomato Canapés

Well. Hello! I’ve missed you.

I’ve spent the last two years working in animal rescue, but it’s time to dust off the blog and get back in the kitchen. Today I have a super simple but delicious appetizer to share with you. It’s very nearly September and I am desperately clinging to the last gasps of summer. This might just be my favorite time of year; farmer’s markets are overflowing and I fall in love with ingredients I’ve taken for granted all over again.

Blackened Tomato Canapés

Case in point: the tomato.

This recipe was made for the late-summer haul of juicy, sweet, perfect tomatoes. Use tomatoes worthy of a spotlight. If you happen to be growing your own grape tomatoes (and your own basil!) than this has got your name all over it. It’s quick to prepare and tastes great at room temperature, so you can make a bunch and let your dinner party guests enjoy them at their leisure. Perhaps on a deck with a nice bottle of red? I don’t have a deck, and didn’t throw a party, so I won’t tell if you just make these for yourself as a light snack on a weekend afternoon. They are so easy you can absolutely make them without an occasion.

Blackened Tomato Canapés
Makes about 25 pieces

1 Pint Cherry Tomatoes
Around 7 Slices of Sourdough Bread
25 Basil Leaves
1 Cup Balsamic Vinegar (or prepared/purchased balsamic glaze)
Olive Oil
Sea or Kosher Salt
Fresh Cracked Black Pepper

Start off by preparing the crostini. Arrange your oven racks so you have one at the very top and set your oven to Broil.

Prepping the Crostini

Slice the sourdough into bite-sized triangles. I like to cut the bottom crust off with a long chef’s knife (helps you get a nice clean edge) and create one big triangle. Slice that in half for two triangles, and each of those in half again. Each piece of bread should give you 4 small triangles. You can save the scraps to make your own breadcrumbs, or toss them to the birds.

Prepping the Crostini

Arrange the bread on a baking sheet and brush lightly on one side with olive oil.

Prepping the Crostini

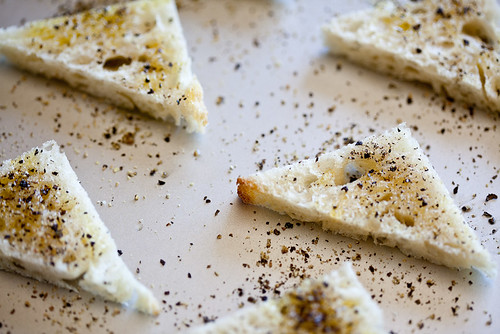
Season generously with sea salt and fresh cracked black pepper. I like to go a little crazy with the black pepper, but if you don’t like its signature heat, you can ease up on it.

Seasoned Crostini

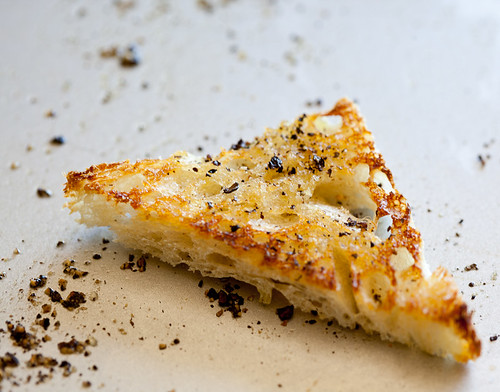
Broil for 2-4 minutes (watching constantly) until perfectly golden. Remove from oven and set aside. Do not walk away from these while they are in the oven or they will burn up!

Blackened Tomatoes

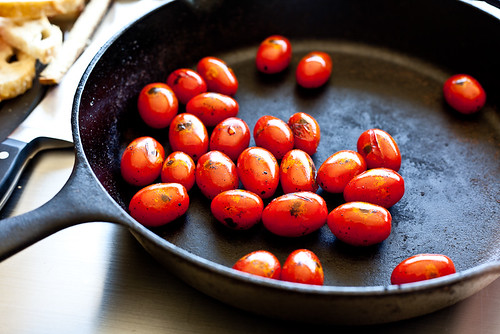
Now grab your cast-iron skillet and put it over high heat, very lightly oiled. You can make the tomatoes in a regular pan if you don’t have cast-iron, but a cast-iron pan is perfect for this application. Once the pan starts to smoke, add the tomatoes. Every 10 seconds or so, gently shake the pan to toss the tomatoes around. We are looking to char the skin a little while only lightly cooking the tomatoes.

Meanwhile, if you need to make your own balsamic glaze, add 1 cup of balsamic vinegar to a small sauce pot and bring to a boil. Reduce about 75%, until it becomes a thick glaze, being careful not to burn. Set aside when done. This takes about 10 minutes or less.

Blackened Tomatoes

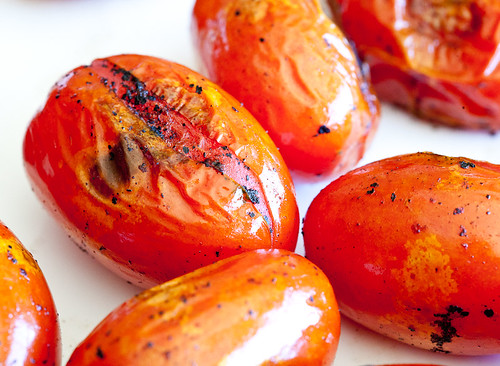
The tomatoes are done when the skin is speckled with black char and begins to split. You are not making tomato sauce, so don’t overcook them until they are mushy. We want quick cooking over very high heat (about 5 minutes total) to add flavor but to keep the individual tomatoes whole.

Assembly

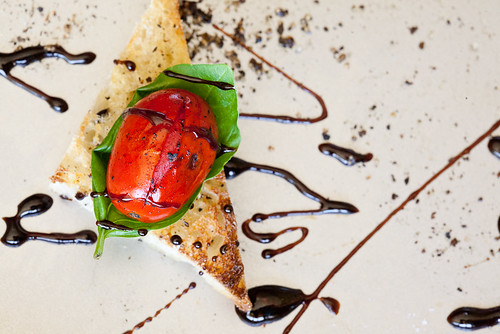
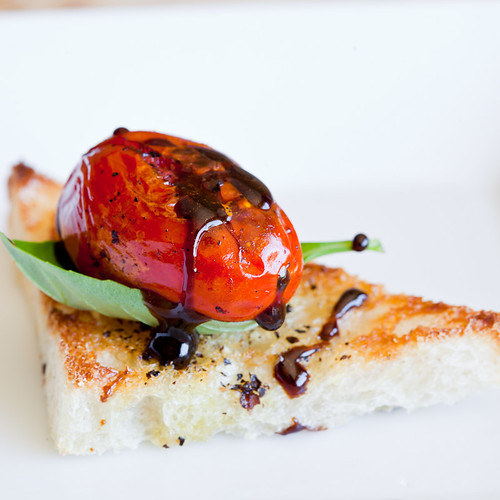
Once all your ingredients are ready, begin assembly by placing a single basil leaf on each piece of crostini. I like to flip the leaf inside out to create a little boat for the tomato to sit in.

Blackened Tomato Canapés

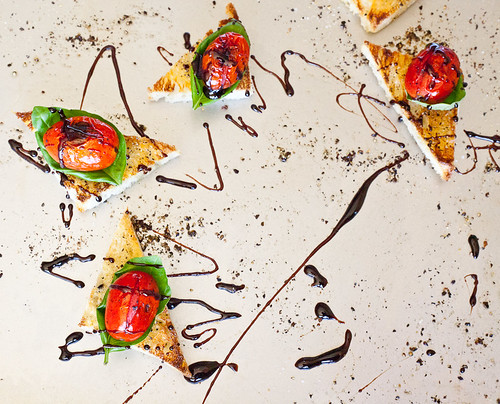
Top each piece with a single tomato and drizzle the balsamic glaze over the top. If you did not salt the bread enough before baking, you may wish to add a little pinch of salt over the top, but taste it first to be sure!

That’s it! If you happen to have leftover tomatoes, they would be a wonderful addition to just about any recipe. I think they would be killer in pasta or chopped up as a salsa base.

Blackened Tomato Canapés

Avocado Wasabi Salad

Avocado Wasabi Salad

Yes, I know. It’s a salad.

Who wants to go to a vegan website and see a recipe for salad? I keep salads to an absolute minimum around here. So when one does show up, it’s a freakin’ delicious salad.

And this one is definitely freakin’ delicious.

I’ve had the idea of an avocado based salad dressing kicking around in my head for the last few days, and an avocado kicking around my kitchen counter. This salad is easy to throw together, and is a great entree salad, or a side salad for a dinner party or some such get-together.

The dressing is rich, and despite the title, is pretty damn tasty even without the added wasabi. You have my permission to leave the wasabi powder out altogether if you don’t like it or can’t find it.

I don’t know if my wasabi powder is old and has lost its kick, or if you need a massive amount of it to make things spicy (anyone with experience want to weigh in?), but this dressing was as mild as the day is long. It added a great flavor, but no heat. You may wish to add in your own wasabi powder slowly, tasting as you go, just in case yours is spicy.

The other ingredients are simple but flavorful as well. Pan-fried wasabi-soy chickpeas, sauteed broccoli, toasted almonds, and shredded carrots. I find this mixture goes particularly well together, adding crunch, sweetness, protein, and color. And they all pair wonderfully with the dressing.

Avocado Wasabi Salad

Speaking of the dressing, it’s pretty ugly stuff. This isn’t something you’re going to want to serve on the side for your guests. Toss it with the lettuce and then serve it. Just trust me on this one. You’ll see when you make it.

Avocado Wasabi Salad
Serves 4-6

Greens of your choice for 4-6 people
1 Carrot, shredded
2 tsp Vegetable Oil, divided
1/2 to 3/4 Cup Broccoli, chopped small
1/3 Cup Toasted Slivered Almonds
1 Recipe Wasabi Chickpeas, below
1 Recipe Avocado Wasabi dressing, below
Fresh Cracked Black Pepper

Wasabi-Tamari Chickpeas
1 tsp Oil
1 Cup Chickpeas
1 tsp Wasabi Powder
1/2 tsp Sugar
1 Tbs Low Sodium Tamari/Soy Sauce

Avocado Wasabi Dressing
1 Ripe Avocado, diced
2 tsp White Wine Vinegar
3 Tbs Hummus, plain or garlic
1 tsp Stoneground Mustard
1/2 tsp Salt
2 tsp Wasabi Powder
1/4 to 1/3 Cup Vegetable oil

Begin by whisking the dressing ingredients together, except for the oil. Whisk until smooth. If your avocado isn’t super ripe, you may wish to blend the dressing in a food processor. Slowly add oil until emulsified and the dressing is smooth, refrigerate until ready to use.

Toast your almonds in a dry pan over medium heat if they are not already toasted. Set aside.

In the same pan, add 1 tsp of oil and add broccoli. Sautee over high heat until the broccoli is beginning to color in spots and is bright green, but still tender-crisp. Sprinkle lightly with salt and set aside.

Add the second teaspoon of oil to the same pan and add the chickpeas. Reduce heat to medium-high. Cook the chickpeas until they are golden on all sides, using a spatula to loosen them as necessary, but don’t worry if they stick a little. Add the wasabi powder, sugar, and tamari and stir well. Remove from pan and set aside.

In a large bowl, add your salad greens. Add the broccoli, 3/4 of the chickpeas, 3/4 of the almonds, and 3/4 of the carrots. Toss with enough dressing to coat. Plate the salad, and garnish the top with the remaining chickpeas, almonds and carrots. Crack fresh black pepper over the top. Serve immediately.

If you are serving the salad later, do not add the dressing until the last minute.

PS – I have a new “like” button down there over the comments if you want to heart a recipe without commenting. :) And if you’re interested in what I’m cooking, and what us in line for the blog, become a fan on facebook.

Avocado Wasabi Salad