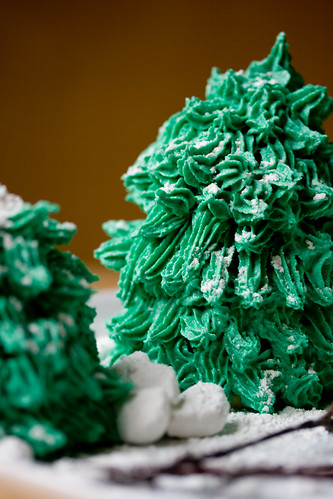
Winter Pine Tree Cakes

This is a super cute dessert idea for winter-themed parties, and it isn’t much harder than making and frosting cupcakes. If you have a sharp knife, some toothpicks, a piping bag and a star tip, you’re good to go. It’s even more fun to make than it is to look at, or eat!
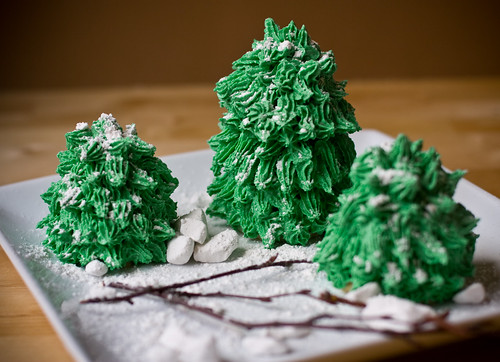
All I did was bake some cupcakes, cut them into cone shapes, stack them (secured with toothpicks) and then frosted them in such a way so that they looked like pine trees. Powdered sugar adds a little snow. At first I was bummed that my powdered sugar had so many HUGE lumps in it, until I realized they looked like little snow boulders. Score! You could get really creative and make little marzipan pine cones, or birds, or squirrels… you get the idea. Why not make a sweet little forest for your friends and family to devour?
Oh man, I just realized I could have built an igloo out of sugar cubes. Next time, I guess!
I used gel food coloring, both green and blue mixed together to get the shade right. Using only green was too light and minty for what I was going for – so make sure you have some blue on hand to darken it up. But there’s no reason your trees need to be green. White trees would be stunning on a darker plate, or other non-standard colors like pink or brown to play up their cutesy, cartoony look.
Basic Sponge Cake
Makes 15 cupcakes (a few extra for practicing)
1 1/3 Cups Soymilk mixed with 1 tsp Apple Cider vinegar
2 Cups All Purpose Flour
1 Cup Sugar
2 tsp Baking Powder
1 tsp Baking Soda
1 Tbs Cornstarch
1/2 tsp Salt
1/4 Cup Oil
1 tsp Vanilla Extract
1 tsp Almond Extract
Preheat oven to 375º F.
Mix soymilk and vinegar. Combine flour, sugar, baking soda, baking powder, cornstarch and salt and mix well. Add oil and extracts to soymilk mixture and whisk. Add wet to dry and fold until just combined. Fill each lined, sprayed cupcake mold with 1/4 cup batter. Bake cupcakes at 375º F for 20 minutes. Remove from pans and let cool completely.
Frosting
Enough for 5-7 trees
1/2 Cup Earth Balance Margarine
1/2 Cup Non-hydrogenated Shortening
1 tsp Vanilla Extract
About 3 Cups Powered Sugar, sifted, more if needed
Food Coloring (green and blue for standard trees)
In a stand mixer, whip margarine and shortening until light and fluffy. Whip in extract. Slowly whip in powdered sugar until icing is fairly stiff. Add coloring bit-by-bit until desired color is reached. Transfer icing to a piping bag fitted it a small/standard sized star tip
Creating the Trees
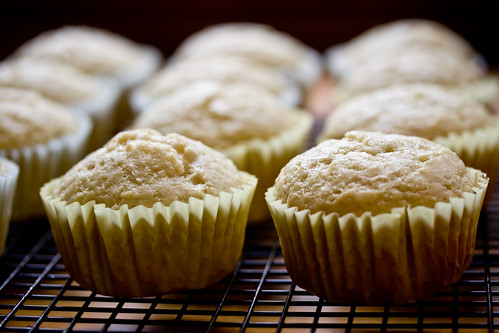
Bake the cupcakes!
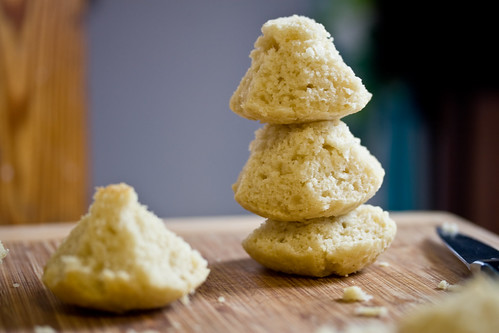
Unwrap the cupcakes and turn them upside-down. With a knife, carve the cupcake into a cone. If needed, flatten the base so the cupcake cone sits without wobbling.
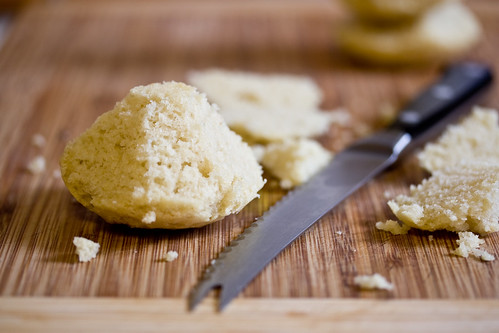
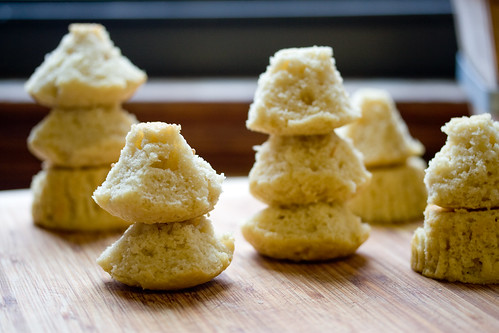
Stack the cupcakes to make basic tree shapes. Three high for tall trees, two high for short trees. Secure with toothpicks. You may want t make the base of your trees squatty so that they help the tree stand.
Create your forest!
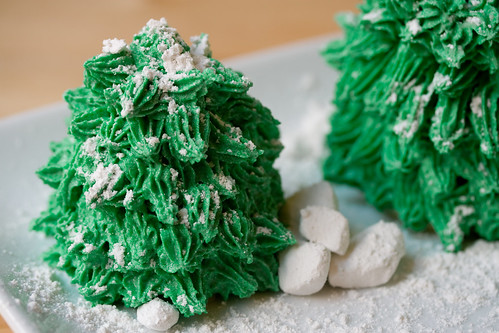
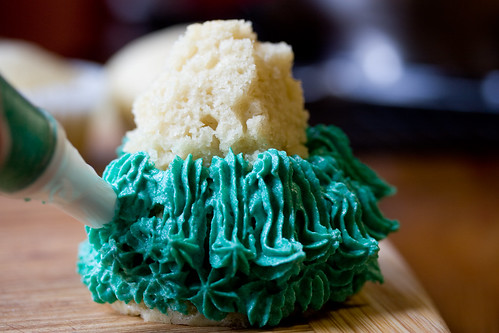
Begin icing your trees. If you don’t have a revolving cake platter to ice on, use a small cutting board that you can easily turn as you work. Start from the bottom and ice around and around up towards the top. Use long-ish strokes that end in an upward sweep to create branches. You can go back and fill in holes or weird spots later.
Finish off with shorter, horizontal or upward pointing branches, and then one directly on top pointing straight up. Take a look at your tree and add branches where needed.
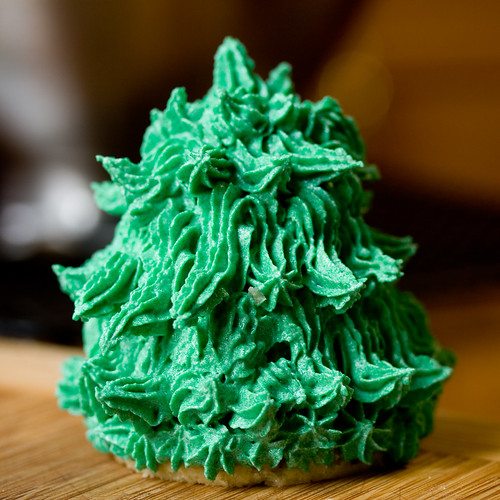
Use a spatula to gently and carefully transfer the trees to your serving plate. Add lumps of powdered sugar if you have them, and anything else to finish up the forest scene. Sprinkle with powdered sugar to add snow to the trees.
Happy winter!