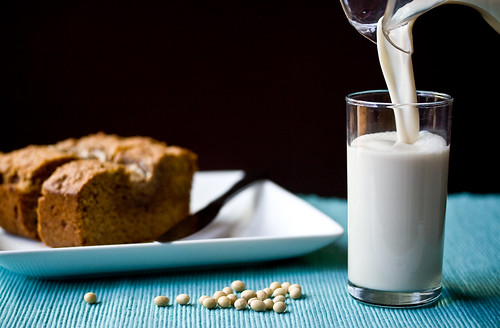
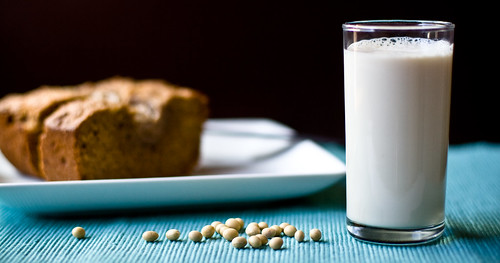
Homemade Organic Soymilk
When I decide to do a food experiment, I’m pretty good at predicting how the final product will turn out. I’ve been thinking about making my own soymilk for a while now, even though I was pretty sure I wasn’t going to like the end result. So I spent some time looking for tips on how to make the best tasting soymilk at home. With those tricks up my sleeve, I started soaking the beans last night and crossed my fingers, hoping my initial prediction would be wrong.
But I was right. As pretty as my soymilk is, I wouldn’t drink a glass if you paid me.
Now, it’s not terrible. It’s not even bad. It’s just different. I was REALLY hoping I’d be all “homemade soymilk tastes better!” and “commercial soymilk sucks!” but sadly, my palate is keenly attuned to Silk brand soymilk, which has been processed and messed with to such a degree that I think it might be impossible to replicate it at home.
 It bums me out that I like commercial stuff better, but them’s the breaks.
Usually I don’t share recipes on my blog that I don’t approve of (on the rare occasions that I do, I’m not shy about saying so), but I think the process of making soymilk is interesting. I thought you might like to see how you can make it at home without a fancy $100 machine. I hear the machines are great, mind you, but if you’re considering buying one you should definitely give this a go before you invest in one to make sure you’ll like the taste.
And just because I don’t like the taste of homemade soymilk, it doesn’t mean you won’t. It’s… beany. And… well? Beany is the best word for it. I’m also hoping that someone who makes tasty soymilk at home all the time will read this, discover a flaw in my recipe or technique, and give me the secret to tasty soymilk. This was my first time making it, afterall, so it’s possible the I just screwed the whole thing up.
Soaking the beans
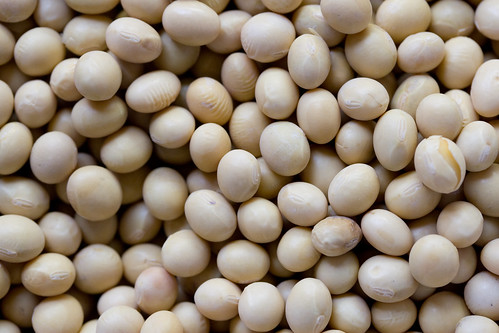
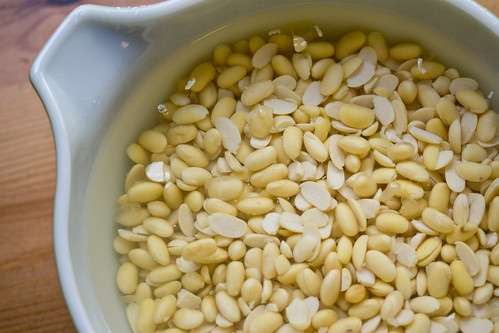
Right. So the first thing you’ll need is organic dried soybeans. I hear there’s a particular variety called Laura soybeans that have a better taste, but they’re expensive and only available online. I picked mine up at my local grocery store in the bulk section. The night before you make your soymilk, soak the beans in a large amount of cool water overnight.
 It’s amazing how much water these babies soak up, so give them ample space to expand. If you’re going to soak them for more than 8-10 hours, soak ‘em in the refrigerator. They’ll keep refrigerated for a few days, just change the water whenever you think of it. (At left: dry vs. soaked)
Removng the Skins
I read that you can reduce the beany taste of your soymilk by removing the skins before blending them with water. They were supposed to “slip right off” after soaking, but mine required a fair amount of agitation to remove. I ended up scrubbing them mercilessly between my palms, like I was washing the plague off my hands, but, you know, with soybeans instead of soap. After about 10 minutes I gave up.
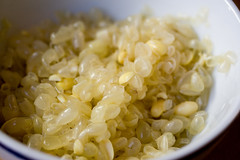 After removal, the skins were also supposed to float to the top of the water for easy scooping, but mine didn’t seem to be all that buoyant. To separate them from the beans, I ran the faucet at full-tilt into the large pot the beans were in, so that the overflowing water would carry the skins with it. That worked alright, but I did need to use a slotted spoon to help the process along. I think I removed just over a cup of skins, and I’m sure I didn’t get all of them. Below is a bowl full of throughly abused soybeans.
Blending the Beans
Now it’s time for blending. I have a crazy Vita-Mix blender, which pulverizes anything in its path. I think that a regular blender will work fine for this. Your okara (the bean pulp, more on that in a second) might not be as fine, but that probably makes for easier straining. You’ll need to blend in batches:
1 Batch, for 1+ Cup Finished Soymilk*:
1 Cup Soaked, Skinned Soybeans
3 1/2 Cups Water
Let your blender run for at least two minutes. You want to make the mixture as smooth as possible. If your blender won’t fit the batches as measured above you can blend less, but keep the proportions of beans:water the same. I made two batches.
*It’s possible I over-reduced my soymilk by simmering it too long and/or failing to use a lid, which may be why the flavor is so intense. Boil yours with a lid for a higher yield.
Straining
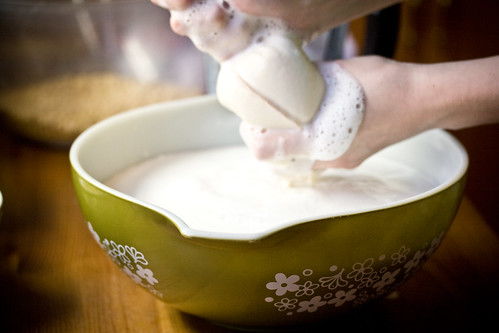
Strain your blended soymilk into a large bowl. I used a nutmilk bag, which is essentially a fine mesh bag with drawstring that strains out even the even very tiny particulate. If you don’t have a nutmik bag, use several layers of cheesecloth, or a very fine chinois strainer. You can not over-strain your soymilk.
Really. I strained mine five times: three times before cooking and twice after it was finished and cooled.
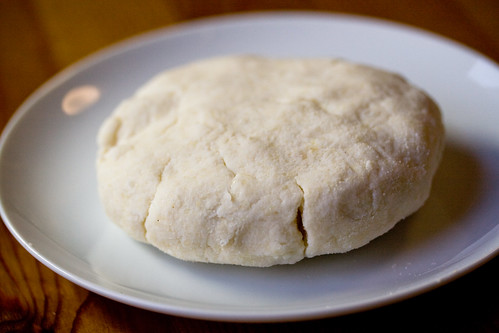
The pulp leftover from straining is called okara. There are many recipes that call for okara, so save it to use later. Keep in mind, though, that many recipes call for okara that comes out of soymilk machines, which is cooked okara. This okara is raw and REQUIRES cooking of some sort to break down/neutralize nasty enzymes that we humans can’t digest very well. I think I’m going to try Susan V’s Okara “Crab” Cakes, myself!
Boiling the Milk
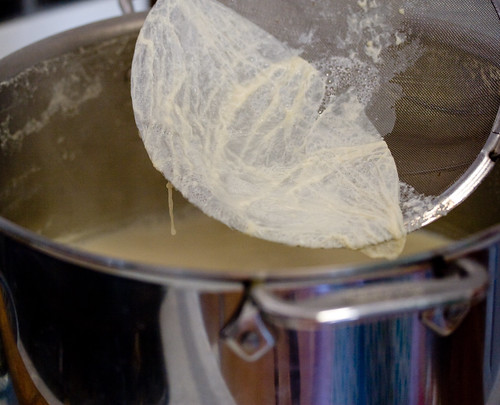
Bring your strained soymik to a boil. Once it’s simmering, cook it for 20-30 minutes. While it’s cooking, yuba (a skin) will form on top. Skim it, and any foam, off. Yuba is edible, an a lot of people really enjoy it, so check out recipes for that, too!
Flavoring, Cooling and Storing
At the end of cooking, flavor your soymilk. I added a pinch of salt and a scant tablespoon of sugar. Add a little bit at a time and taste it as you go until you reach the flavor you like the best. Transfer it to the refrigerator and cool. After cooling, I strained mine again to remove any extra yuba that had formed, and removed even more particulate that had settled at the bottom. Your soymilk should last about a week in the fridge. Glass containers with lids are best
Final Thoughts
I’m pissed that I don’t like it more, but it was a neat project. It was only recently that I realized it was even possible to make soymilk at home. I think I’ll stick to buying mine. I’ve had great success making nutmilks at home (specifically almond milk), and they’re not only easier to make but really, really tasty to boot. If I try to make soymilk again, I might add rice, or oats, which I hear helps the reduce the beany flavor, but other than that, I’m not sure how much more palatable I can make it.
Soymilk experts, any advice?
According to the Cornell recipe I read years ago, from what I remember you don’t need to take the husks off the beans after you soak them. Then add 1 cup boiling water to the blender to heat it up. Have ready a thick towel and more boiling water. Add 1 cup beans to the blender with 4 cups boiling water. Wrap it with the towel and blend for a couple of minutes. Strain it off into a saucepan, and proceed with the rest the same way. It’s important to keep the beans hot to stop the enzymatic action which makes the soymilk taste bitter.
And that’s all I’m sure about, I wish I could remember the timing of heating up the liquid or if you could add more water to the mash to make more (I don’t think so). I think the recipe might have been in an Adelle Davis book. Anyway, it tasted waaaay better than the commercial stuff, which has been watered down too much. Although, I just bought a great soymilk which isn’t too thin, has 12 grams of protein/cup and it’s only ingredients are soybeans and water. It’s called “Edensoy”.
Hi, I just found your blog. I don’t like commercial soy milk at all – Rice Dream is the only commercial milk-substitute I’ve found that we like. BUT I do like the soy milk we’ve made in the “$100 machine”. Doing it by hand looks like too much work for a regular basis for our large family. But the machine is so simple and makes good milk very quickly and easily – soy, nut, even rice – though that took a while to “perfect”. And, except the soy, I can do them all raw, which I REALLY like. So we don’t do soy often, even though the machine does it great. We usually make raw nut or nut/rice milks. The machine paid for itself in just a a few of not buying commercial non-milks.
I don’t really like Silk soymilk… I have to mix it equal parts with rice milk to be able to drink it straight, but man… Soymilk in japan is just So Good and in many flavors and probiotic drinks that I hit up the konbini every 2 hours when I’m there. xD… That said, the closest thing I have found in the u.s. Is kikkoman’s Pearl brand… But you should definitely look to Japanese cookbooks for inspiration on homemade soymilk :)
There are as many recipes and ways of making soy milk as there are traditional Chinese/Japanese/Korean/SE Asian households.
Heat the beans a for a couple minutes in a microwave once you have them hulled. If the hulls don’t come off easily, soak the beans a little longer. You may have had a particularly dry batch (this ain’t an exact science).
Add a TOUCH of salt, this can improve flavor. I happen to like vanilla and almond soy milk, so I add a few drops of extract and some honey/brown sugar/sugar, depending on the mood I’m in.
I prefer homemade, both the taste and the cost. My problem is that I haven’t found a source for dried soybeans :-).
Hi! Our family has been using soy milk for about 25 years – from powders to the commercial Silk types, and I’ve been teaching cooking classes for 30 years. In February I finally bought a SoyaJoy G3 and love it because you can make cooked as well as raw milks. I have found that Country Life Natural Foods in Pullman, Michigan, has organic soybeans as good as Laura’s. We compared milk made from both Country Life and Laura beans, side by side, and could not tell the difference. So that’s what I use, and they are way cheaper. I don’t remove the hulls either. If the beans are good, you don’t need that extra, time-consuming step. TOO MUCH WORK!!! We experimented and found the milk to be the same with and without the hulls. If you use some millet and rice with your soybeans, you can get a great tasting milk. And of a touch of salt, good organic cane juice crystals, and vanilla makes it heavenly!
What I ended up doing was combining several recipes. I first rised my beans to get any chaff out of the beans, then soaked my beans (1 cup) with about 1/8th tsp baking soda for around 12 hours. I then rinsed and gently rubbed off any skins. I continued rinsing the beans until there were no skins remaining. instead of boiling and grinding the beans I used my soymilk maker. I then started straining the milk until there was no residue left and the milk would pass through a very fine strainer. I then added vanilla syrup for flavoring. It came out a very smooth soy milk that was similiar to unflavored or slightly vanilla soymilk. one drawback was that the one cup of beans ended up making 2 cups of milk.
my only advice would be to try to wean yourself off the commercial stuff. i’m chinese/vietnamese and grew up drinking only the real deal, so when i tasted the boxed soy milk, i couldn’t believe it was being marketed as soy milk! hope you give it another chance. i love making my own at home too. this method requires much less straining and is super easy: http://kissmyspatula.com/2009/12/20/fresh-homemade-soy-milk/
When first making soymilk, it came out with a beanie flavor to it. I tried covering up the bean flavor with splenda and vanilla. Still, not to good. I once spent a week removing the skins off the beans, Still no good. Almost gave up making soymilk. Now I just soak the beans for a day or two and do the following. Comes out great. Best soy milk I have ever had.
One day I came across an article on making soymilk. Said to blanch the beans in 1-2 quarts of boiling water with 1 teaspoon of baking soda for 5 minutes. Do this twice.
Note: I use two pans. 1 large enought to hold 6-8 quarts of water, to boil enought water for making the milk, and a smaller one to blanch the beans
Recipe:
1-cup soybeans soaked in cold water for about 8-12 hrs. Rinse often.
Blanch the beans.
Note: 1-cup dry beans turns into almost 3-cups after soaking.
Mix 1-cup soaked soybeans on hi speed in a blender with 3-4 cups boiling water for 5 minutes.
Note: You must hold the cover on real good or it may explode. I put the cover on and take out the middle piece for adding ingredients off. You can cover the hole with a cup or paper towel. I have not had a problem mixing with the small hole on top uncovered.
Repeat with the rest of the beans.
After mixing, put in a large pot, and bring to a boil. Stir often.
Adjust the heat and simmer for about twenty minutes. Stir often.
Strain the mixture with a fine strainer. Some use cheese cloth.
Makes about ½ gallon.
You could add some splenda, vanilla, or brown sugar to add some flavor to it, while you cook it. I found that once I got the beanie flavor out of the milk, it didn’t need anything added to it.
I know this page was released quite a few years ago, so im a bit late but, the beamy flavour probably came from the mixture not being cooked enough, yes maybe from no lid as it couldn’t retain the heat. When it’s not cooked enough it can become bitter or beany flavour.
I was taught that in order to prevent such a ‘beany’ flavor you have to bring the beans to 170-180 degrees and blend them at that temperature with water of that temperature. It has something to do with enzymes and starches. Then you should bring the water/pulp mixture up to a simmer slowly, never letting it actually boil, maintaining this for 30 minutes. You should also add at least 1/8th of a teaspoon of natural salt (make sure its natural salt that has no iodide and no anti-caking agent as this will make it bitter) for every quart of finished product.