Mini Yellow Cake with Chocolate Icing
Someone really needs to open a vegan bakery in Boston and hire me. I’d love to decorate cakes and cupcakes all day long. In case all you were waiting for was an employee, I give you the go head to set up shop. I’ll wait.
I’m sure many people are inspired by pictures of food, or something they ordered in a restaurant, or by those gorgeous, full-color coffee table cookbooks. I am too, to some extent. Sometimes, though, I feel most inspired by gadgets, pans, and obscure kitchen tools. I have the most adorable little kitchen store near me, and I often go in there needing cupcake liners and leave with something else entirely. The last time I went I brought home two 4.5″ spring form pans, and this is the tiny, sugary result.
Layer cakes are something I often crave but rarely have the initiative to get up and make. In fact, I talk about cake often enough that my husband invented “bowl of cake” for me – he mixes some ingredients together in a cereal bowl and microwaves it until baked, then voila! Bowl of cake!
I don’t really have a recipe to share with you since both the cake and the icing is from Vegan Cupcakes Take Over the World. I do have some random tips and ideas, though, so maybe those will inspire you.
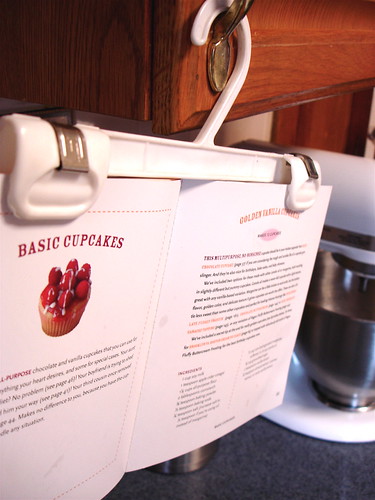 This, first of all, wasn’t my idea originally. I can’t remember where I saw it, but it’s so brilliant, you should know about it if you don’t already. Go into your closet, find a pants hanger, attach to cookbook, and hang from your cabinets while cooking. I could kiss whoever thought of this. My cookbooks stay clean (when I remember to hang them), the recipe sits at eye level, and I don’t have to use up precious counter space!
It won’t work too well with thick, hardcover books, but most of my paperback cookbooks hang without a problem.
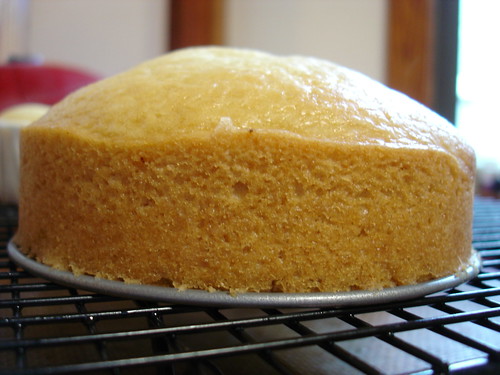 I baked two separate layers, though it’s possible to bake one and split it in half. I was worried about doing this for two reasons. Not only was I not sure that one layer would rise enough to make a decently tall cake, but I also don’t trust my slicing skills that much. I’m glad I baked two separate layers.
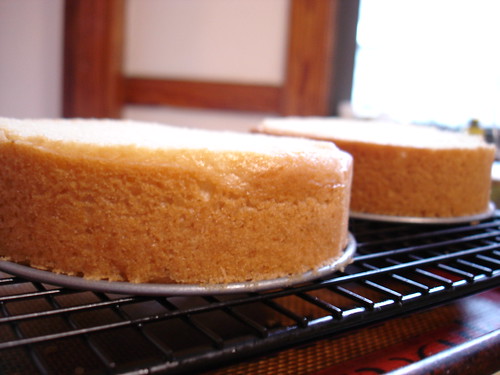 Speaking of slicing, you’ll need to level off the cake to make it pretty. I used a long serrated bread knife, held my breath, and started cutting at the lowest edge of each layer. Little imperfections don’t matter so much, since the frosting will hide them. Definitely use a sharp knife for this, though, or you’re tear your pretty little cake to shreds.
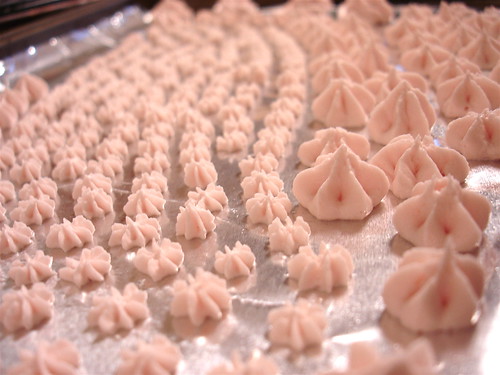 You can pre-pipe your decorations! This is a wonderful idea for so many reasons, not the least of which is automatic stress reduction. You don’t need to pipe directly onto the cake, you can pick only the most perfect flowers and stars to use, and you can even remove them if you change your mind about their location. I covered a cookie sheet with aluminum foil and a thin (THIN) layer of cooking spray and piped right on that. Let air dry overnight. You can also freeze them if you only have an hour or two. If you freeze them, remove each one with the tip of a butter knife and work quickly, they’ll soften up fast!
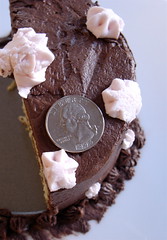
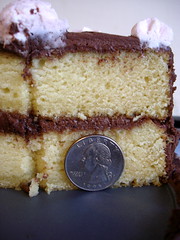
I didn’t realize until this morning that I had failed to take a picture that truly shows the scale of this cake. Here’s two of the leftover, half eaten, saran wrap dented and smooshed cake:


Lolo,
Thanks for sharing all the little bitty details- I love your descriptions! I wish I lived near you so we could get together and bake!
~Dee
I think you should open the first vegan bakery in Boston, and I will work for you. Or at least test stuff…
veggiedee – Thanks! Too bad you’re not near Boston, I’d love someone to bake with!
Nikki – Sure, I’ll get right on that. I’m only missing a number of things, not the least of which is a pit full of money. Sigh.
OMG- that looks so delicious and beautiful at the same time!
Did you have trouble bringing yourself to eat eat (because of how gorgeous it was???).
Also, thanks so much for sharing the cookbook/hanger idea. That is so, so, so awesome!!!
SO BEAUTIFUL!!! As always. I have to make a cake for a birthday this weekend and was thinking of using a recipe from VCTOtW… You have totally inspired me. And I can’t believe the GENIUS of the coat hanger thing. Wow!
The coat hanger tip is priceless!! Your cake is so cute. The size is perfect. I always want cake too but just can’t bring myself to make a whole cake (especially a 2 layer cake). Even 12 cupcakes is difficult since it’s just my husband and I. I usually wind up halving the recipes.
Holy Cow!
Once again, you amaze with your fun and beautiful creations!
And I definitely, definitely know what you mean about being inspired by kitchen gadgets. I have experienced that so many times.
Incidentally, I agree – you should be the one to open the vegan bakery!!
Thanks for the pants hanger tip – great idea! That mini cake is the cutest little baked item I have seen in some time. Great job. If I were looking to expand my little baking shop I’d hire you. :)
This look so yummy! Quick question: Did you only use one batch (i.e., enough batter for 12 cupcakes) of the recipe for your two 4.5″ springform pans?
Oh, and did you use the same cooking time (20 to 22 minutes) and temp (350F)?
Wow, thanks everyone!
Claudia – I made “one batch” of cupcakes and had enough batter left over for 4 regular sized cupcakes. I baked it at the same temperature, but it took about 30 minutes to bake all the way through. I’d check it after 25 minutes and see where it’s at. :)
I just tried it! My favourite kitchen supply place only had 4″/10cm springform pans, so mine are slightly smaller than the ones you used.
I halved the recipe — in other words, used six cupcakes’ worth of batter — and didn’t even need to trim the cakes afterwards, since they rose so evenly.
Blogger won’t let me post pics in a reply, so I’ll send them to you separately :-)
Thank you for the coathanger idea – I’ve tried it a few times since reading this post last week, and it’s so convenient and might just keep my favourite books (like VCTOTW and VWAV) from becoming more food-encrusted.
Hey there! Just discovered your AMAZING blog, soooo many recipes I want to try…boy howdy. This cake is beyond adorable– and I thought I’d share a storage tip so your next one doens’t get smooshed by saran wrap! Use an upside-down tupperware container to store baked goods– you put the cake on the upside-down lid, then lower the bowl part over the cake and click into place. It’s airtight for freshness, but the frosting won’t get ruined. This trick has saved me many times…but maybe you’re not as OCD as I am– ha!
I heard the tip about the coat hanger years ago- it’s a good one! Another good tip – if you want to have your cookbook flat and keep it clean, place a pyrex pie plate or cake plate on your recipe book- you can read through it and it holds your book open.
Wonderful , I love little desserts & yours are great. Very impressive. I look forward to trying some of your recipes. You need to find a cake decorating/supply store in your area , should have 6″ rd boards and boxes for storage and transportation of your little creations.
Good looking cake!
I personally think you’re best doing two separate layers instead of slicing them – even though I like to think I can slice well, the two layers often comes out better in the end
Keep having fun with baking!
We LOVE your cookbook. OH~ I own a licensed vegan home bakery in ME…not TOO far from Boston. ;o) If you’re ever in the state, I’d love to swap ideas. ~ We tried your vegan “egg sandwiches” and were just amazed! My 4yr old loved them, made bagel sandwiches with your maple tofu triangles. Thank you!!