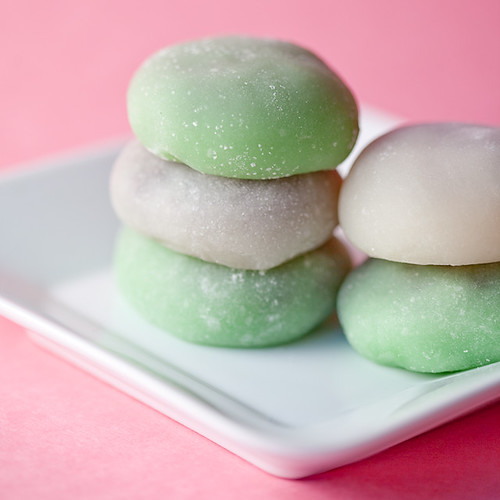
Daifuku

I first encountered daifuku at one of my favorite restaurants in Western Massachusetts, Fresh Side. In their deli case were these cute little white and green pillow-looking desserts, sitting behind a hand-written card that said: Mochi (vegan).
I ordered one and when I bit into it, it was such a surprise. First, the texture! It’s like a dense marshmallow, chewy and soft. Sweet, but not overwhelmingly so. Next, the filling. Beans. Beans? Beans. This particular mochi was fillied with a sweetened red bean paste, also called anko, and I think it was the first time I had ever had sweet beans. And it was really good!
Now, if I understand correctly, mochi is a catch-all term for a sweet dessert made with glutenous rice flour dough. It can be baked, wrapped around ice cream, eaten plain, or filled. Filled mochi, like the ones I’m blogging about today, are called daifuku.
Anko is one of the most common fillings, but many people also use berries. Strawberry filled ones are very popular in the spring, and they’re called ichigo daifuku. Whole raspberries also work, and sometimes people include a white sweetened bean paste (as opposed to red) known as shiroan.
Now what if I told you that I made these in the microwave?
I know!
Really.
I was skeptical, too. The microwave in my house is pretty much reserved for reheating leftovers. When I decided to make these, I was sort of shocked that all the recipes online called for nuking the dough. What’s more, they were pretty unclear about how to tell when you’re dough is ready. Microwaves seem to vary so much in power, 3 minutes in one microwave is very different than 3 minutes in another. But I decided to give it a go, and not only did it work, but it was really, really easy. If you are able to find pre-made red bean paste, you can make this whole recipe with only a microwave and just a few minutes.
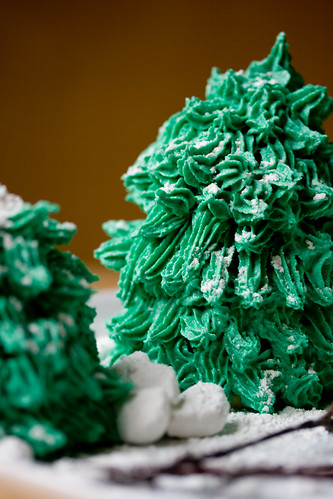
So not only do you not need a kitchen for these (hello dorm-living vegans!), they’re also gluten free (hi celiacs!), soy free (hi soy…allergic lovelies!), fast (hi lazy people!), customizable (hi picky people!), and did I mention CUTE? Traditional colors are white, green, and pink, but food coloring isn’t required if it grosses you out. Matcha (green tea powder) is a natural and delicious flavoring that makes the mochi green.
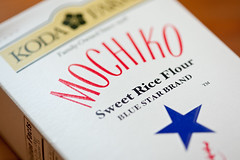 Now the one thing you absolutely need, no substitutions, is mochiko. It’s glutenous rice flour, and no other flour will work for this. You can find it easily at any asian market.
Also make sure you have some cornstarch or potato starch handy, the dough is very sticky!
Daifuku
Makes 10-12 Filled Cakes
1 Cup Mochiko
1/4 Cup Sugar
2/3 Cup Water
2-3 Drops red or green food coloring, optional
Cornstarch or Potato Starch, for dusting
Filling Ideas
Anko (store bought or recipe below)
Strawberries
Raspberries
Anko
Makes enough for 3-4 batches of daifuku
1 14 oz Can Adzuki Beans
1/2 Cup Water
1 Cup Sugar
1 Tbs Vegetable Oil
1-2 Pinches Salt
Heat water and sugar separately until boiling and sugar is dissolved, turn off heat. Drain and rinse beans.
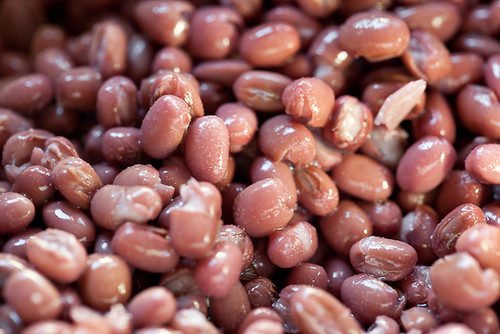
Add to a pan and mash. Add 1/3 cup of the simple syrup you just made, along with salt and vegetable oil, and mash over medium heat. Beans will thicken and become slightly glossy. Add more syrup if desired. Turn out into a bowl and let cool.
Making the Mochi
Add the mochiko, sugar, water, and food coloring (if using) to a microwave safe bowl. Stir well, making sure there are no lumps. Scrape down the sides of the bowl as best you can with a rubber spatula, otherwise they’ll get all gross when the dough is microwaved.
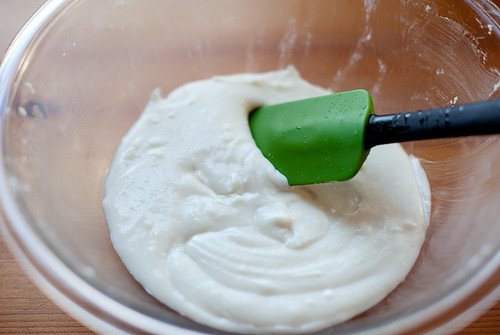
Cover lightly with plastic wrap and mircowave for 2 minutes. Remove bowl from the microwave and stir VERY well. Dough will be much thicker, but there should still be some raw parts underneath. I like to use a sturdy silicone spatula to mix the dough at this point. Place the dough back in the microwave for 1 more minute.
Open the door and peek–did the dough start sinking as soon as the door opened? If so, the dough was inflating while cooking, which means it’s ready. If not, microwave for 1 more minute and check again. You shouldn’t have to microwave for more than 4 minutes total (2 minutes initial cooking, 2 more additional minutes after mixing).
One the dough deflates when you open the door, remove the dough from the microwave and scrape it out onto a cornstarch-coated cutting board.
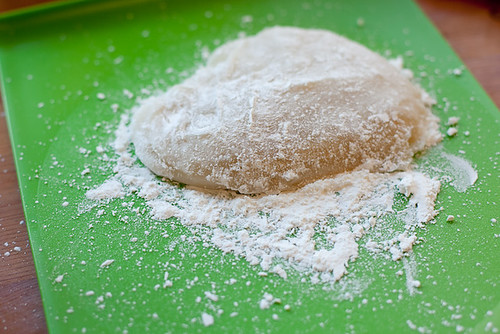
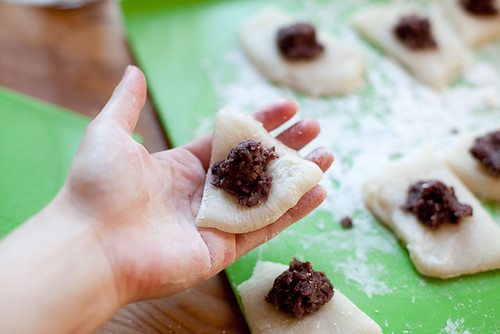
Pat the hot dough (be careful! It’s hot!) with cornstarch and flatten it out a little. Cut into 10-12 even pieces. Add 1 tsp of filling to each piece and gently press the edges together to seal.
Here’s the whole process in a little HD video for you to watch! No sound, so don’t worry about turning down the volume if you’re at work. The video starts right after I took the dough out of the mircowave and dumped it onto the cutting board.
Making Daifuku on Vimeo.
The best way to keep these fresh is to individually wrap them in plastic wrap and then refrigerate. If you leave them out, unwrapped, they’ll get dry and tough. Enjoy!