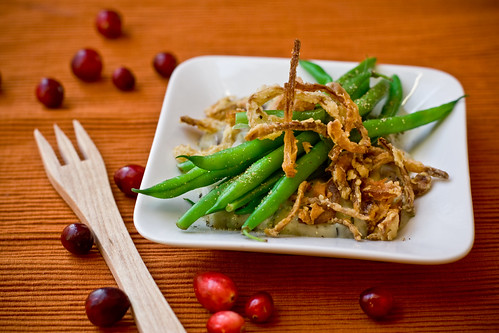
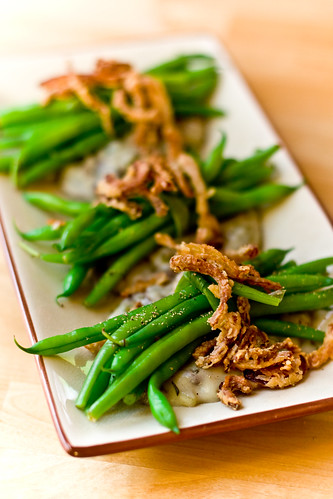
Category: appetizers

Vegetable Tempura

Vegetable Tempura

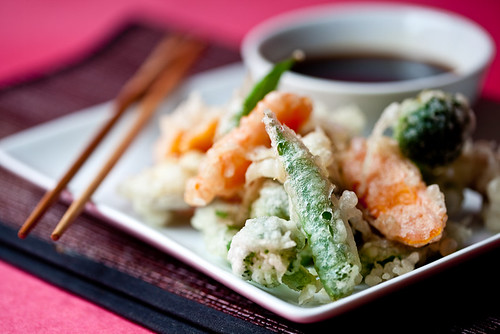
I really love vegetable tempura, but it often the batter contains eggs, so I have to skip it when I’m eating at a japanese restaurant. But it’s really easy to make eggless tempura at home. You can absolutely pick up a box mix of “tempura powder” at a local asian market and skip the egg the directions call for — even the box says it’s optional. Or, you can use this recipe and make your own batter from scratch.

When you see “serve immediately” at the bottom of this recipe, I’m not kidding. You want to have absolutely everything set and everyone ready to eat when the veggies come out of the oil. As the veggies cool, the once crispy breading will begins to soften, leaving you with soggy tempura. No fun. So make sure you have your place settings, your dipping sauce, and your friends or family ready to go once the veggies hit the oil.

The oil temperature needs to be 180º C or 350º F. If you add a lot of veggies to the oil at once, not only will they stick together (not so bad), but the oil temperature will drop like a rock (very bad). Tempura fried at too low a temperature will never become crispy. It’ll cook, but it’ll be a soft, heavy coating instead of a light, crispy one.

Vegetable TempuraHow can you tell if your oil is hot enough? When you drop a batter coated veggie in, little bits of batter will explode off the veggie outward like tempura fireworks. These bits, called tenkasu, are a good indication that your batter is hot enough. The veggies should cook for 40 seconds to 1 minute and feel crispy when you knock them around. You don’t need them to be golden brown, so don’t wait for that.

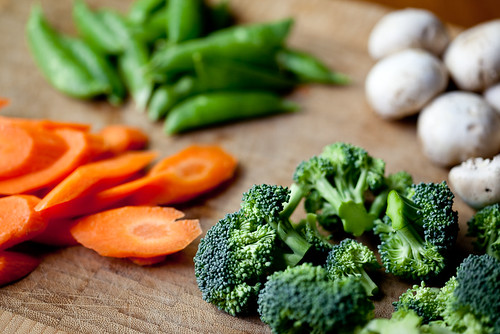
Most vegetables will cook to the perfect tenderness in that time, including harder ones like carrots if you keep their width to 1/4″ thick. For harder vegetables like squash or sweet potatoes, you may want to briefly blanch them to get them going before frying. But broccoli, mushrooms, and green beans or snap peas don’t require any pre-cooking at all.

I recommend a traditional tentsuyu dipping sauce for these. My recipe is a little different than the ones you find online, but it’s my favorite.

Vegetable Tempura
Serves 2-4

1 Liter Vegetable Oil, for frying
1 Stalk Broccoli, florets only
2 Carrots, sliced on the bias, 1/4″ thick
1 Cup Mushrooms, your favorite
1 Cup Sugar Snap Peas or Green Beans
(Feel free to use any vegetables you like!)

Tempura Batter
1 Cup Cold Water (very cold!)
1 Cup Flour
2 Pinches Salt
1/4 tsp Baking Powder
1 Tbs Ener-g Egg Replacer Powder mixed with 3 Tbs Water
1/4 Cup Extra Water, if needed, for thinning

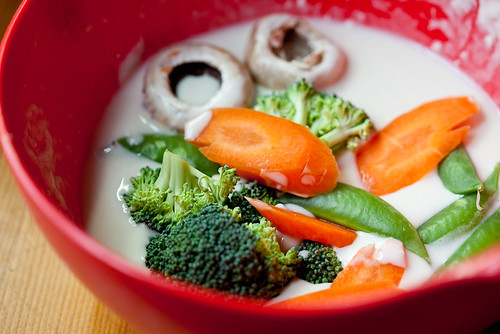
Tentsuyu Dipping Sauce
1/4 Cup Vegetable Stock, or Dashi if you have it
1 Tbs Sugar
1/4 Cup Low Sodium Tamari
1 Tbs Rice Vinegar
1/4 Cup Water

Heat all the sauce ingredients in a small pan until the sugar is dissolved. Set aside to cool.

Chop your vegetables, making sure harder vegetables like carrots are no more than 1/4″ thick if frying raw. Blanch vegetables like squash or sweet potatoes, if using.

Tempura Veggies

Heat your oil to 350º F. A little bit of batter dropped into the oil should float to the surface immediately, and little bits of batter should explode off the veggies when frying.

Dip your vegetables in the batter.

Veggies in Tempura Batter

Drop an assortment of battered vegetables into the oil, being careful not to overcrowd. You may need to turn up the temperature of the oil, because the vegetables will cool it.

Fry for 40 seconds to 1 minute until very crispy and light. Drain on a paper towel for a few seconds.

Serve immediately with dipping sauce and/or salt and pepper.

Vegetable Tempura

Deconstructed Green Bean Casserole

Deconstructed Green Bean Casserole

It is absolutely that time of year again.

I can’t say I’ve ever really been a huge fan of green bean casseroles. I think canned beans has a lot to do with that, along with the whole, you know, not vegan thing. I got some beautiful organic green beans in my veggie box yesterday, and I figured I’d do an updated, fresh, vegan green bean casserole.

But it’s been done. And done right. By the ever-brilliant Susan of FatFree Vegan Kitchen. Check it out! Fresh beans and a homemade gravy; there’s nothing canned about it.

So Susan had scooped me by about two years. What was I going to make? Well, I realized that since I didn’t really like green bean casseroles all that much to begin with, why make a casserole at all? And why not make the fried onions from scratch? And leave the gorgeous beans whole and beautiful?

Deconstructed Green Bean Casserole

If you like green bean casseroles, by all means, go over to Susan’s blog and make that one! It’s the one I would make, and it’d probably be the first green bean casserole I’d like. If you’re up for it, use the homemade fried onions from here to top it off. I know people love French’s, but homemade ones don’t have hydrogenated oil, TBHQ, or propylene glycol in them. And you can make them ahead of time, too!

If you don’t like casseroles all that much, but do like fresh beans, fried onions, and mushroom gravy, then give this a shot. It makes a beautiful starter or side dish.

Deconstructed Green Bean Casserole
Serves 8

Fried Onions
2 Medium Onions, sliced thinly
2+ Cups Soymik (or your favorite non-dairy milk)
All-Purpose Flour (or your fav. gluten-free blend!)
Oil for frying
Salt

Mushroom Celery Gravy
1 Tbs Olive Oil
2 Cups Sliced Mushrooms
2 Ribs Celery, diced
1 pinch Salt
4 Tbs Earth Balance Margarine
4 Tbs Flour
1 to 1 1/2 Cups Soymilk*
1/4 tsp Salt
1/2 tsp Thyme
Black Pepper

1lb Fresh Green Beans
Scallions, for tying
Pepper, for garnish

*I thought it would be really smart to use the soymilk I soaked the onions in to make the gravy. It wasn’t. It gave the gravy an overwhelmingly raw-onion taste, and ruined it for me. Unless you really, really like onions, I suggest using fresh soymilk for the gravy.

Fried Onions
Begin by making the fried onions. Cut the ends off the onions, peel them, and slice them in half lengthwise. Slice them thinly into half-moons. Try to keep your slices all the same width so that the onions cook evenly.

Sliced Onions

Soak the onions in 2+ cups soymilk for at least 10 minutes. Heat oil over medium heat in a wok or other pot to a depth of 1-2 inches. I’ve found that I can use less oil to fry in a wok; since the sides are curved the oil pools in the middle.

Grab a handful of onions from the soymilk, shake them off a little, and place them in a bowl. Coat with flour completely, tossing with two forks to keep your hands clean. Use enough flour so that they’re not soggy.

Onions and Flour

Test the oil by putting one onion in, if it bubbles up, it’s ready. Guard against the oil being too hot – it should take 7-9 minutes before the onions start to turn golden brown!

Fry for 7-9 minutes a batch, turning occasionally, until the onions are very crispy and caramelized. The onions themselves should be a very rich golden brown, beautifully caramelized, and the breading a light golden brown. Drain on a paper towel or cloth, and sprinkle with salt to season.

Fried Onions

If making ahead, store in an airtight container until ready for use.

Green Beans
Next, bring a large pot of salted water to boil. Blanch the green beans for 1-2 minutes, or until tender crisp but still bright green. Shock in an ice bath to stop the cooking, drain and set aside.

Gravy
In a skillet, saute sliced mushrooms and celery in 1 Tbs of oilve oil until tender and fragrant. Season with a pinch of salt. Remove to a bowl and add earth balance margarine to the same pan over low heat (don’t bother to clean it out!). Once melted, add flour and whisk well to create a roux. Slowly add in the soymilk while whisking, turn the heat up, and whisk while it thickens to form a smooth sauce. Add thyme and salt to taste, adjusting the thickness by adding more soymilk if needed. Stir the mushrooms and celery in.

Serving
Slice the chives in half, lengthwise, and use them to tie up little bundles of green beans. You can reheat the green beans before serving by placing in a low oven or quickly steaming.

Tying Up Green Beans

To serve, place a few spoonfuls of gravy on a dish, and place the bean bundle on top. Sprinkle with fried onions and grind fresh pepper over everything. Enjoy!

Deconstructed Green Bean Casserole