Spring Crêpes Three Ways

Happy Spring, lovelies!
It’s time to break out of our winter food ruts, and I think I have just the thing. Crêpes! They’re light and can be filled with almost anything, but to get your imagination started I’ve created three recipes for you to try.
Now, vegan crepes. They’re not hard once you get the hang of them. The recipe I’m posting here comes from a veganized version of a standard “Eggless Crepe” recipe that’s floating around on the interwebs. I just subbed soymilk and Earth Balance for milk and butter. I also think it needs a little extra water, and I’ll point that out in the recipe below. There is also a really good crêpe recipe in Veganomicon, if you have that cook book, but it calls for chickpea flour. If you have your own favorite recipe, use that! Whatever works for you will work here.
There’s a little video below to get you started if you’re new to crêpes.
The great thing about these is that you can make absolutely everything ahead. They heat up in minutes, so it’s perfect if you’re cooking bunch or lunch for several people who all want different fillings. Simply place the cold crêpe in the pan, put the fillings on top, heat through, and serve. I make extra crêpes and keep them in the fridge for quick meals for the next day or two.
So, the fillings!
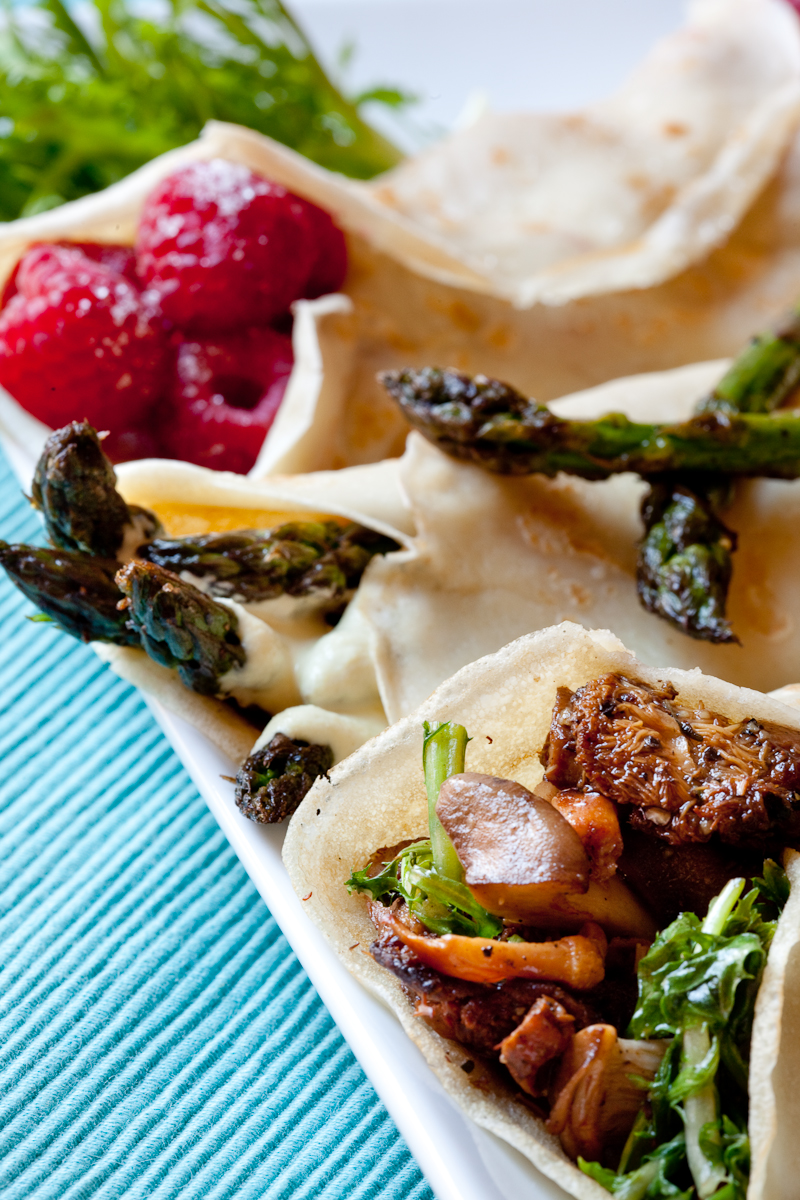
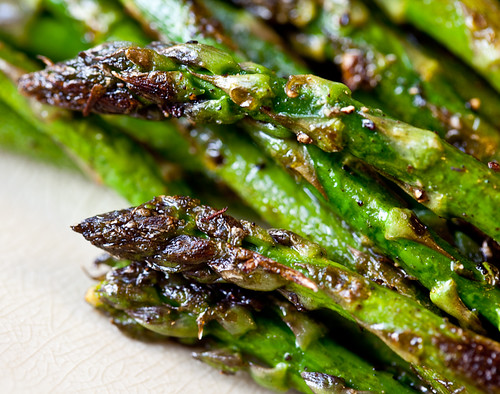
Asparagus Hollandaise
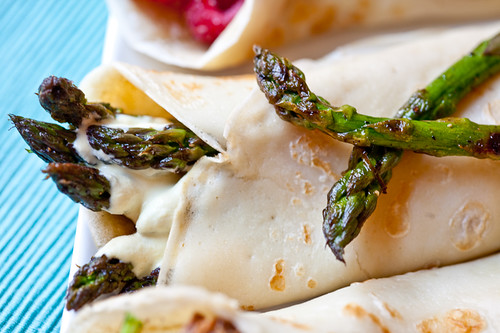
Asparagus season is here or will be shortly, and this creamy hollandaise-ish sauce is perfect with spring-tender stalks. I just quickly pan-seared them so they’d have lots of flavor without overcooking them. You can check out my guide to buying and prepping asparagus if you like. The sauce has an almond base, so if you have good blender, you should be able to throw it together in minutes. Nutritional yeast is optional, but it does give it a nice pale yellow color and as well as some flavor. If you leave out the yeast, you might want to add a little turmeric for color.
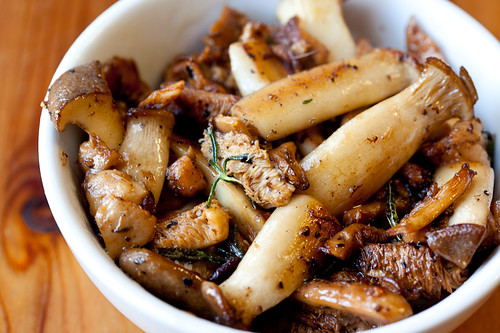
Wild Mushroom and Wilted Frisée

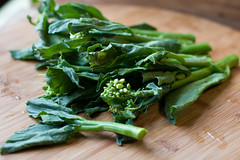
I’m a sometimes-mushroom person. Sometimes I love them, other times I eat around them. I find the less-common mushrooms to be the tastiest. I used king trumpet and chanterelle mushrooms in this crêpe, and man were they delicious. Morels are coming in season, and they’d be wonderful, too. You’re welcome to use more standard mushrooms if you want (cremini, portabello, button), but these fancier ‘shrooms were a real treat for me. I paired them with some wilted frisée (also called curly endive or chicory). It’s kind of bitter, but seems to mellow out with a quick sauté. It matches the mushrooms perfectly.
Berry Crêpes
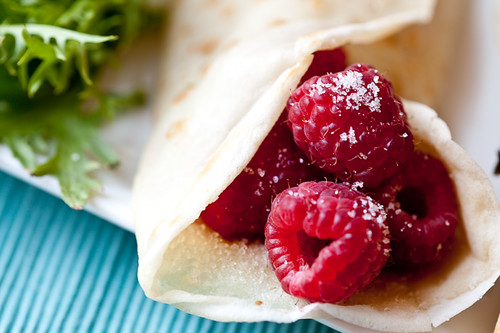
I really wanted to use strawberries in this one, but alas, it’s not quite the season for them yet. The ones at my local store looked pretty sad. The raspberries, on the other hand, looked perfect. You can use any berry you like in these, along with a little sugar. The sugar melts a bit, making this crazy-easy dessert really very tasty. If you want, you can put a few tiny chunks of candied ginger in there as well. You don’t need berries at all; my absolute favorite all-time crêpe is a simple crêpe au sucre. Just sugar. Pure and simple.
Basic Crêpes
Makes 8-10
1/2 Cup Soymilk
2/3 Cup Water
1/4 Cup Earth Balance, melted
1 Cup Flour
1/4 tsp Salt
1 Tbs Sugar (sweet crepes only, optional)
2 tsp Vanilla Extract (sweet crepes only, optional)
2 Tbs Water, to thin if needed
Place all the ingredients in a blender or in a bowl. Blend or whisk until smooth. Transfer to a 2 Cup measuring cup (for pouring) and refrigerate for 30 minutes. While the batter is refrigerating, prepare your fillings.
Asparagus Hollandaise
Fills 2-3 Crêpes
1/2 Lb Thin Asparagus, trimmed
1 Tbs Earth Balance
1 Pinch Salt
Black Pepper
Heat a large skillet (I used then cast-iron skillet for all of the fillings) over high heat. Add Earth Balance and asparagus. Cook for a few minutes, until asparagus are bright green, tender-crisp, and are browning in spots. Add salt and pepper, set aside.
Hollandaise Sauce
1/2 Cup Sliced Raw Almonds
1/2 Cup Hot Water
2 Tbs Earth Balance
2 tsp Lemon Juice
1/4 tsp Salt
2 Tbs Nutritional Yeast, optional (or 1/4 tsp turmeric for color)
1/2 tsp Dijon Mustard, optional
Place all ingredients in a blender and blend until extremely smooth.
Wild Mushroom and Wilted Frisée
Fills 2-3 Crêpes
2 Tbs Earth Balance
1 Cup Chopped Chanterelle Mushroms
1 Cup Chopped Trumpet Mushrooms
1/2 tsp Balsamic Vinegar
Salt
2 Sprig Fresh Rosemary, stem removed
1 Cup Chopped Frisée Greens
1-2 Cloves garlic, minced, optional
 Slice trumpet mushrooms lengthwise, then lengthwise again.
Add the earth balance to a skillet over medium to medium-high heat. Add trumpet mushrooms and saute until beginning to brown. Add chanterelles and rosemary. Turn down heat to medium and cook for 5 minutes, stirring occasionally. Season with a pinch of salt and balsamic vinegar. Remove mushrooms from pan.
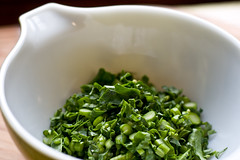
Add garlic and sweat until tender. Add greens and cook until just wilted, one to two minutes. Remove and set aside with mushrooms.
Berry Crêpes
Fills 2-3 Crêpes
1/2 Pint Raspberries (or other berries)
Sugar
Berry crêpes are filled while the crêpes are still cooking. Add sugar and berries to the crêpe as soon as it is flipped. See below for more details about cooking the crêpes.
Making Crêpes
So now that you fillings are all prepared, and your crêpe batter has rested and chilled, we’re ready to make crêpes! I’ve made a video that outlines the whole process, but here are a few things you’ll need:
-A non-stick omelet or crêpe pan
-Cooking Spray
-A graduated spatula (the long flat kind you use for frosting cakes), optional
If your batter is too thick when it comes out of the fridge, stir in 2 Tbs of water to loosen it up.
Here’s how:
How to make Crepes from lolo on Vimeo.
Assembling and Serving
So now you have a stack of cooling crêpes and fillings that have gone cold. No worries. You can keep your fillings in a warm oven until you’re ready to serve, or even easier, warm them up with the crêpes at the same time.
When you’re ready to eat, place a crêpe back in a hot skillet (medium heat is fine) and add the fillings you want in the top. Cover the whole thing and wait a few minutes. You want everything to get hot, but you don’t want to cook the crêpe any more than it is. When it’s hot, fold the crêpe in thirds and serve. It should only take 1-2 minutes per crêpe to heat up, so you can make them to order for your friends and family.
Okay! So are you ready to make crêpes? I hope so, because typing the little circumflex is getting really annoying. Making crêpes is much easier than accenting them correctly, I assure you.