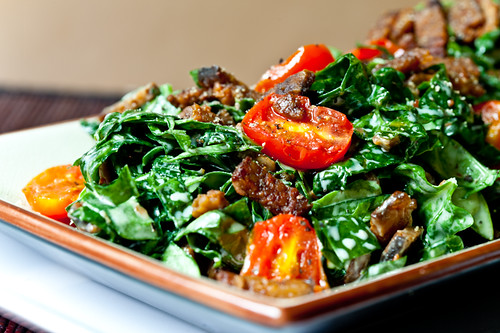
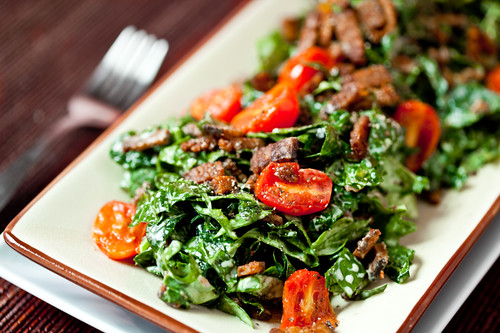
This salad isn’t exactly… healthy. What it is, exactly, is delicious. And it has a surprise. There’s no lettuce. The greens are baby spinach, and raw kale.
Stay with me, here!
Yes, I said raw kale. I know you are thinking that I have finally gone off the vegan deep end. But I swear, the water is nice!
You can eat raw kale, too, if you pay attention to these three things: the kind, the cut, and the preparation. Follow these three steps and I swear you’ll be eating your kale raw and loving it.
Kind
The first step is finding the right kind of kale. Lacinato kale is perfectly suited to eating raw. I find that it’s thinner and more tender than the other varieties, but sadly, it’s not nearly as common. Look for long, thin, flat leaves that are slightly dimpled.

Cut
It’s not always obvious what the best cut is for a certain dish. Small, thin strips of kale is integral for this salad, or any meal where the kale is served raw or lightly cooked. When the kale is cut this way, the dressing has a much easier time tenderizing the kale without having to cook it. Larger pieces of kale would be much harder to eat.
Preparation
With regular lettuce, you wait to add the dressing until just before serving. Otherwise the salt and acid in the dressing starts to break down the fresh, crisp greens, leaving you with a soggy mess. With a kale salad, this is to your advantage! Dress the salad ahead of time and refrigerate it for a bit. The dressing will soften up the kale just the right amount. Plus, the addition of a creamy dressing compliments kale’s flavors nicely.
There are many fake bacon products out there. My favorite is what I’ve used in this recipe, Lightlife’s Smoky Tempeh Strips. While the package says “Fakin’ Bacon” I find that it’s not at all like what I remember of the real thing, but I still like it. It’s smoky and salty and tangy, and it’s AWESOME in this salad (or on sandwiches). But as awesome as it is, bacon it is not. If you’re looking for something that more closely approximates the texture and flavor of bacon, there are probably other brands out there, but I haven’t found one that I like.
One last note: due to the sturdy nature of kale, this is the perfect picnic and pot luck salad. You can throw it together ahead of time and it’ll be perky and crisp when you get around to serving it. If you’re looking for a side dish that can stand up to summer entertaining, this recipe is a good bet.
BLT Salad
4-6 Side Salads
1 Head Lacinato Kale (aka Tuscan or Dinosaur Kale)*
1 Package Lightelife Organic Smoky Tempeh Strips**
2 Tbs Peanut Oil, divided
1 to 1 1/2 Cups Baby Spinach, Packed
1 to 1 1/2 Cups Sweet Cherry Tomatoes (about 25)
Dressing
1/4 Cup Vegenaise Mayo
1 tsp Dijon Mustard
1/4 tsp Salt
1 tsp Lemon Juice
2 tsp Agave Nectar
Freshly Ground Black Pepper
*You can also use regular lettuce if you like, just make sure not to add the dressing until just before serving.
**Sub baked tofu, another mock bacon, or my Smoky Miso Tofu.
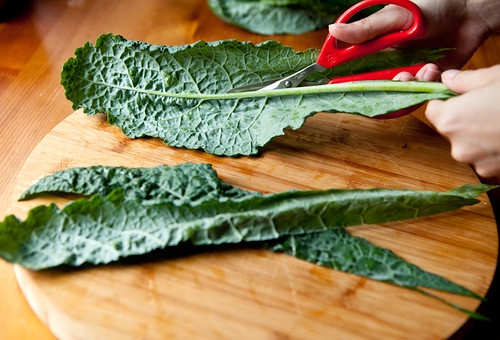
Wash and dry kale. Using kitchen shears (or a knife, or your fingers), remove and discard the center stem from each leaf. I find scissors makes the job quick and easy:
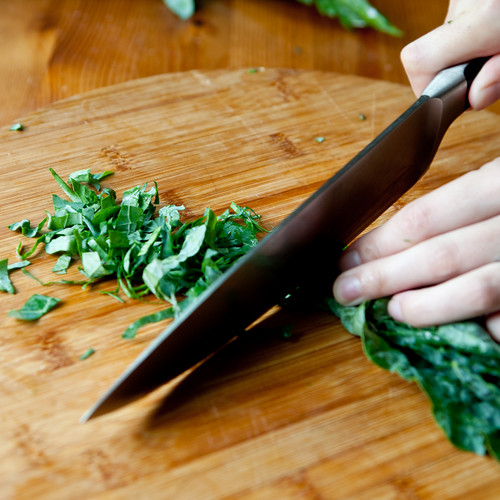
Stack the kale leaves on top of each other and slice into thin strips with a sharp knife:
Place the cut kale into a large bowl. Whisk the dressing together and toss with the kale until evenly coated. If you are using regular lettuce, keep the dressing separate until just before serving. Cover with plastic wrap and refrigerate for at least 30 minutes, longer is no problem.
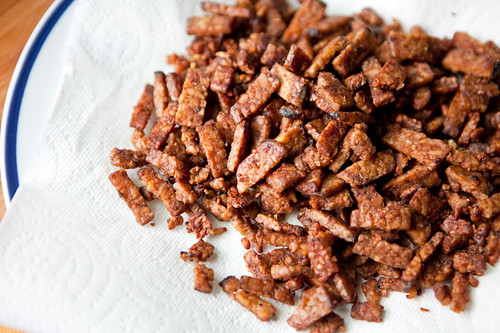
Meanwhile, prepare the “bacon.” Slice the tempeh strips into thin, small pieces, and pan-fry in 1 Tbs peanut oil for about 5 minutes, or until golden brown and crisp on the edges. Drain on a paper towel and set aside:
Next, add another tablespoon of peanut oil to the same pan you cooked the bacon in (don’t wash it out!). Cook the tomatoes with 1/4 tsp salt for 3 minutes over high heat, or until beginning to soften and the juices are starting to come out. Remove to a bowl, with juices, and set aside.
Assembling the salad
Once you are ready to serve the salad, chop up the baby spinach and toss it with the kale, making sure everything is now covered in dressing. If you are using regular lettuce, mix in the dressing now. Add 3/4 of the bacon and the tomatoes and toss again. Plate, topping the salad with the rest of the bacon and some freshly cracked black pepper. Serve.