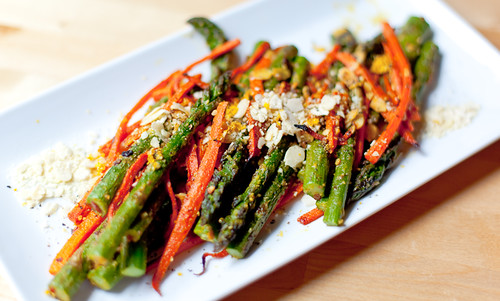
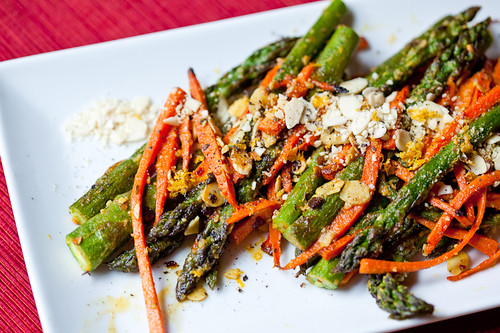
Chili Almond Asparagus
Sorry for the absence, I got pretty sick and needed to take some time off from… everything. Before asparagus season passes us by (it will be gone before you know it!), I thought I’d offer up this simple but flavorful and beautiful side dish.
There are lots of times where I’d like to make a little side dish, but I just don’t want to work too hard at it. Here’s a great recipe for just such an occasion. It’s fancy enough for company, but easy enough for everyday dinner. I first got the idea when I tossed some asparagus in a powdered faux-chicken soup stock and then roasted them. It gave the asparagus a lovely flavor, while helping the spears get golden brown and slightly crispy.
The bare-bones version of this recipe is just tossing the asparagus in oil, a little soup stock powder, and roasting until tender. This version here is the next-step, adding just a few ingredients for a lot more flavor.
Chili Almond Asparagus
Serves two to four as a side
1/4 Cup Sliced Almonds, roughly crushed and divided
1 Tbs Powdered Soup Stock (I used Bill’s Chik’nish Seasoning)
2 tsp Red Chili Flakes
1 lb Asparagus Spears, trimmed
2 Carrots, peeled
2 tsp Peanut Oil (or any kind you like)
1 tsp Toasted Sesame Oil (or any other kind)
Fresh Zest and juice of 1 Lemon
Preheat oven to 450º F.
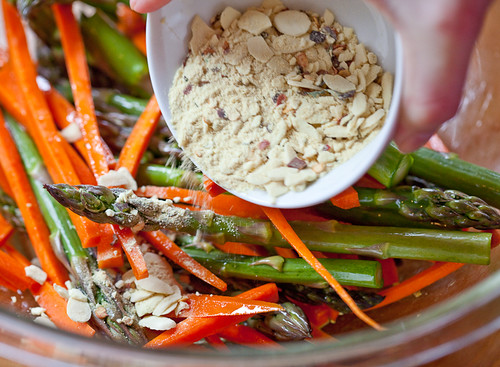
Roughly crush the almonds so that most are ground fairly fine, but there are some larger pieces of almonds left in the mix. Mix together 1/2 of the ground almonds, the soup stock powder, and the chili flakes.
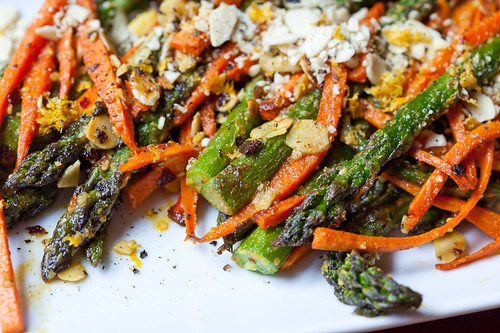
Trim the carrots to the same length, roughly, as the asparagus spears. Half the carrots lengthwise, then quarter them, and continue cutting each piece lengthwise until you have lots of long, flexible, thin strips of carrots.

In a large bowl, toss the carrots and the asparagus spears in the oils. Sprinkle the almond seasoning over the asparagus and carrots and toss well, making sure the coating sticks to the veggies.
Arrange the veggies in one layer on a parchment covered baking sheet. If there is any seasoning left in the bowl, scrape it onto the veggies.
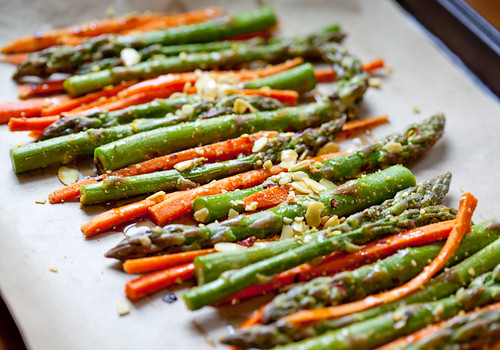
Bake for about 5 minutes, or until the veggies are tender and starting to color. Finish under the broiler for a few minutes (watching it, it’ll burn easily) until brown and crispy in places.
Top with the remaining almond pieces, lemon zest, and season with a sprinkle of lemon juice if desired.
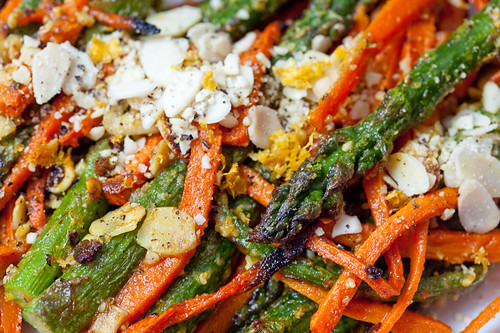
This is best served hot/warm. The asparagus should be cooked through and tender, but not mushy. It’s a perfect compliment to any spring dinner or lunch.