Like a lot of people, I usually travel for Thanksgiving instead of hosting myself. This year, however, I’m able to create a full Thanksgiving dinner. I decided to do it a few days early in case any of you are still looking for some ideas for your own holiday meals.
I was really inspired by Vegan Menu’s Seitan Roulade and decided to take my own stab at it. It seemed like the perfect centerpiece. My recipe is very different than his, but if you’re looking for another filling idea, definitely check out his post!
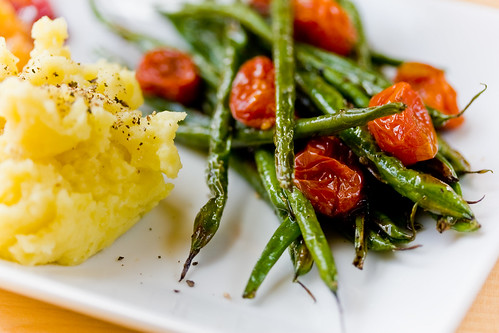
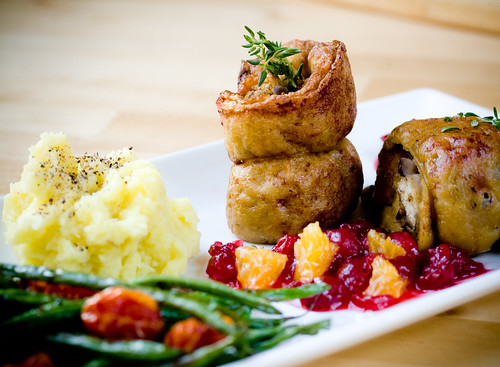
The seitan in this recipe is easily made from vital wheat gluten. It’s wraped around a delicious, homemade herbed chestnut stuffing and then baked. I served it with fresh tangerine cranberry sauce, broiled green beans with slow roasted tomatoes, and fluffy mashed potatoes. Not pictured is a lovely mushroom gravy made with fresh vegetable broth.
You did all make your own vegetable broth, right?
The majority of this meal can be prepared in advance, so if you have the day before Thanksgiving to start cooking, your meal will be well under control by the time you wake up on Thanksgiving morning. Less time in the kitchen means more time celebrating with your loved ones! I’ve included a game-plan at the end of this post so you have an idea of exactly what you can do in advance.
To save even more time, stop by Trader Joes and pick up a box of their already prepared steamed and shelled chestnuts, packed in an airtight bag–not canned! This will save a ton of prep work and roasting time. I haven’t seen these available in any other store, but if you have any tips, do let me know in the comments. Prepping them from scratch works, too.
Alright, there are a lot of recipes to get to, so let’s get started!
Edit Dec. 2008: The seitan part of the roulade apparently sucks! It worked fine for me, but lots of readers are having trouble with it. Until I revise the recipe, beware! Make it at your own risk! :)
A YumYum Thanksgiving
Serves 8
Seitan Roulade with Chestnut Stuffing
Seitan
2 Cups Vital Wheat Gluten, (1 box of Arrowhead Mills brand)
1/4 Cup Nutritional Yeast
1/2 tsp Salt
2 1/3 Cups Warm Vegetable Broth
Mix gluten, yeast, and salt in a large bowl until well combined. Add the vegetable stock and gently mix with your hands until all of the dry mixture is moistened. You should have a soft, squishy, wet dough. Knead a few times, and agitate the dough by squeezing and pressing it.
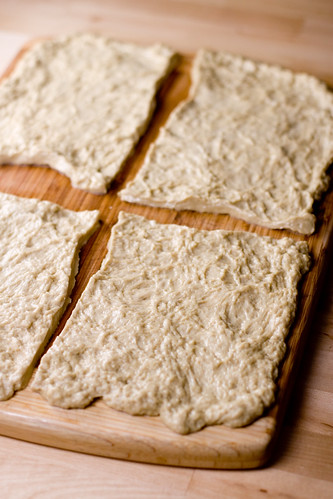
Dump the dough out onto a large cutting board and use your fingers to press it out to a 12×18″ rectangle. If the dough is too springy, let rest for 15 minutes before rolling it out. Cut the dough into quarters:
Heat a large, non-stick skillet over high heat with some olive oil. Briefly pan-fry the seitan pieces until just barely golden brown on both sides. This gives color, flavor, and kick-starts the cooking process so your pieces will be easier to handle.

Set aside until you’re ready to roll up the roulades. Make the stuffing.
Chestnut Stuffing
2 Tbs Olive Oil
2-3 Shallots, chopped finely
10 Cremini Mushrooms, chopped (1 cup after chopping)
2 Ribs Celery, chopped
1 Box Trader Joes Prepared Chestnuts (about 1 1/4 cups, chopped)
7 Fresh Sage Leaves, chopped
2 Thyme Sprigs, leaves only
1 Tbs Fresh Chopped Marjoram
5 Cups Cubed Bread, (for homemade, see note)
1/2 to 1 Cup Warm Vegetable Broth
Salt
Pepper
Note: If making your own bread, take 1/2 of a 1 pound loaf of sourdough and slice into cubes. I leave the crust on! Spread out the bread on a baking sheet and bake at 300º F for 30 minutes, tossing half-way through.
In a large, deep skillet, heat oil and saute shallots until beginning to color. Add mushrooms and carrots and cook until softened. Add herbs and chestnuts. Add bread and toss. Add broth 1/2 cup at a time until stuffing is softened but not overly soggy. Season with salt and pepper. If not using for roulades, place stuffing in an oiled casserole dish and bake at 350º for 20-30 minutes, or until golden brown on top. If using for roulades, set aside to cool.
Place stuffing on top of a piece of seitan, covering the whole surface. Roll up the seitan, stretching it to make as tight a roll as possible. Let the roll rest on the seam.
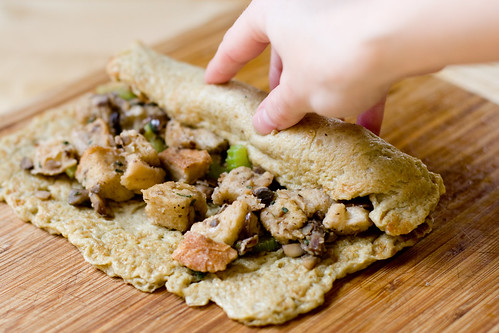
With kitchen twine or any cotton string you have, tie up the roulade so that it doesn’t unroll:

Repeat for the three other sheets of seitan. Place the tied roulades on a baking sheet covered in parchment paper. Lightly brush with olive oil. Bake at 350º for 30-40 minutes, turning half-way through, until golden brown.

Let rest 5-10 minutes before slicing. Remove strings before serving!

Broiled Haricots Verts with Slow Roasted Tomatoes
Slow Roasted Tomatoes
2-3 Pints Grape Tomatoes
Oil
Salt
Pepper
Preheat oven to 350º F. Coat tomatoes in olive oil and season with salt and pepper. Place on a baking sheet covered with aluminum foil. Bake for 40-60 minutes until very soft and beginning to color. Can be made a day in advance.
Broiled Green Beans
16 oz Haricots Verts (or regular green beans)
Salt
Pepper
Olive oil
1 Pinch Sugar
Coat green beans in oil, and season with salt, pepper, and sugar. Place them on a baking sheet covered in foil.
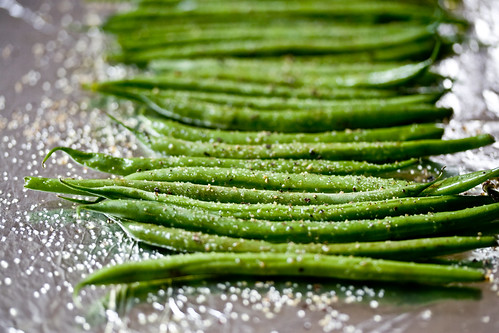
Broil beans (just a few inches from the heating element of your oven) for 4-6 minutes or until softened and slightly browned. Toss with warm slow-roasted tomatoes and serve.
Mushroom Gravy
2 Tbs Olive Oil
1 Cup Chopped Cremini Mushrooms (measured after chopping)
1 Pinch Salt
2 Fresh Sage Leaves, chopped
1 Stem Fresh Thyme, leaves only
1 tsp White Wine Vinegar
Black Pepper
3 Tbs Earth Balance Margarine
3 Tbs Flour
1 Cup Vegetable Broth
Soymilk, for thinning
Heat oil in a large skillet and add mushrooms, salt, and herbs. Cook for 4-5 minutes until softened and add vinegar. Stir well. Add a few grinds fresh black pepper and remove mushrooms from pan. Don’t clean out the pan! Turn the head down to low. Add margarine and flour and whisk until a paste (or roux) forms. Slowly add vegetable broth, whisking all the time, until mixture is smooth. Turn the heat back up and whisk until the mixture thickens into a gravy. Add soymilk in small splashes if gravy becomes too thick. Season with salt and more pepper to taste.
Tangerine Cranberry Sauce
1 16 oz Bag Fresh or Frozen Cranberries
1 Cup Water
1 Cup Sugar
Juice from 1 Tangerine (about 1/3 cup)
Zest from 1 Tangerine
Heat all the above ingredients over medium high heat in a sauce pan. Stir occasionally.
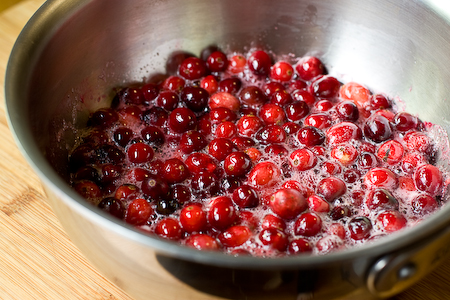
The cranberries will pop, and after 10-15 minutes of cooking the sauce will thicken and no longer be watery. Refrigerate and serve when needed. Garnish with fresh slices of tangerine if desired.
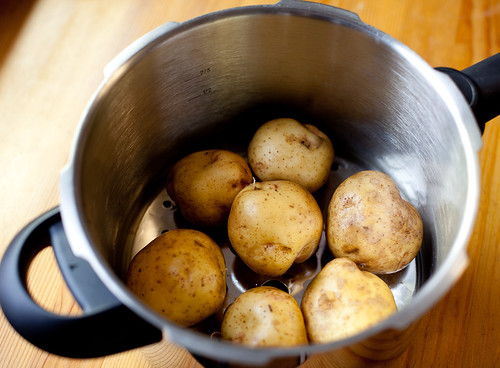
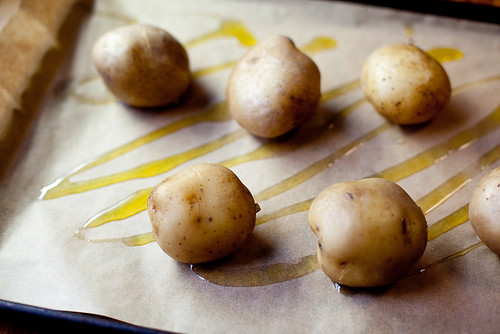
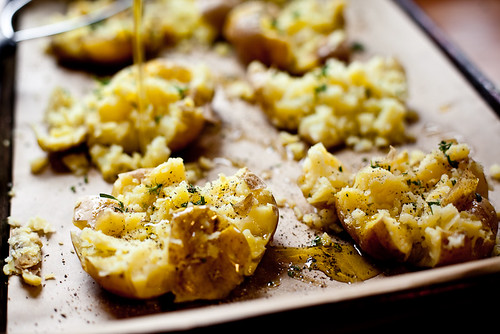
I also served fluffy mashed potatoes, but I figured you probably don’t need a recipe for that. However, I can say that making mashed potatoes in a pressure cooker is my favorite way to prepare them. Since the potatoes are not submersed in water, they are extra light and fluffy. And they cook so fast, too! If you have a pressure cooker, dig it out to make your potatoes this year. You won’t be sorry.
Here’s how you can save time by preparing parts of this meal ahead of time:
Anytime before:
-Make vegetable stock, refrigerate for 1 week or freeze
One or Two Days Before:
-Make bread cubes for stuffing
-Make seitan, roll it out, pan fry it
-Make the stuffing
-Roll up the roulades, cover in plastic wrap, refrigerate
-Make the cranberry sauce
-Slow roast the tomatoes
The Day Of:
-Bake the roulades (40 Minutes)
-Broil the green beans (4-6 minutes)
-Make the gravy (10-15 minutes)
-Make the mashed potatoes (15-20 Minutes)
So yeah! That’s what I’m having for Thanksgiving this year. What are you having?