Candied Clementines

When Valentine’s day rolls around, there are a lot of desserts to choose from. There’s a lot of red, and a lot of hearts, and lots of strawberries. In February. I’m not opposed to buying stuff out of season, but I decided to go with something a little different for a V-day dessert this year.
Clementines are in season, and they are totally yummy. They’re small, easy to peel, sweet as sugar, and seedless. You’d think that simmering them in simple syrup for a couple hours would be overkill, but in fact it actually tones down the sweetness, and brings out some of the bitterness of the peel. The sugary sweet clementines become more complex, slightly bitter, but retain their bright citrus flavor.
If you’re not into candying the whole fruit, I ran across this recipe online for candy-coating the segments. They’d stand in very nicely for the whole fruit, and it doesn’t take as long.
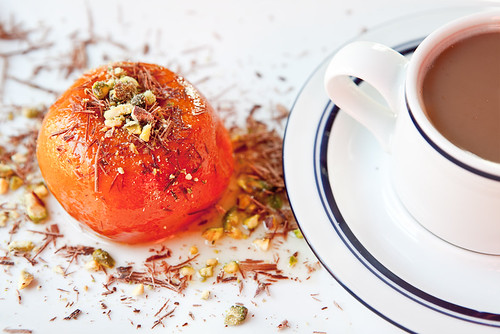
These make a simple but decadent dessert, topped with crushed pistachios, shaved bittersweet chocolate, and served with a small demitasse cup of hot cocoa. It’s the perfect treat for the darling clementine in your life.
Candied Clementines
Makes 12
12 Clementines, washed
4 Cups Sugar
3 Cups Water
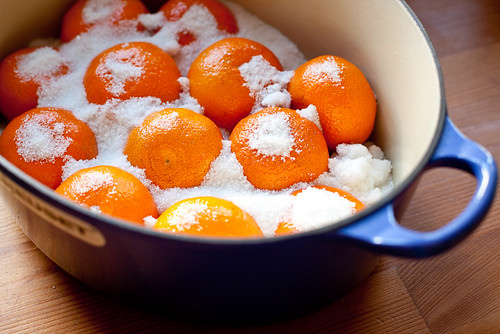
Wash the clementines well. Pierce them 8-10 times with a toothpick. In a large, deep pot, combine clementines, sugar and water.
Bring to a simmer, covered, and simmer for 1-2 hours depending on the level of bitterness you’d like in your clementines. Be careful to simmer, and not boil! Let the clementines cool in the syrup. (Save the simple syrup for additions to drinks and desserts.)
Serve clementines with crushed pistachios and shaved chocolate.
Before you ask, I’m not exactly sure how to store these. I’d guess an airtight container, in the fridge to be safe. I’d bring them to room temperature before serving.
Hot Cocoa
Small Portions For two
2 Tbs Dutch Pressed Cocoa Powder
1 1/2 Tbs Sugar
1 Cup Soymilk (or other non-dairy milk)
Combine cocoa and sugar in a small pot. Add a dribble of soymilk and whisk to form a paste. Add the rest of the soymilk and heat until steaming. Serve in demitasse cups.