Posts filed under 'dessert'

Plum Kuchen

Plum Kuchen

Kuchen means cake in German. There are as many different kinds of kuchen as there are kinds of cake.

I saw this recipe for upside-down plum kuchen in the latest issue of Gourmet Magazine, and I just had veganize it. I’m glad I did, because the cake base of this kuchen might now be my favorite coffee cake base ever. It’s light and fluffy, and like my Slow Rise Pancakes, it uses yeast instead of baking powder or baking soda for leavening. I really love the clean, rich flavor of yeast-raised goods, so when I looked at this particular recipe I knew I had to make an animal-friendly version.

They used plums in the Gourmet version, so when I found tiny, sweet organic plums at the Copley Farmers Market here in Boston, it was kismet. However, I’m not sure I’d recommend you use plums in yours.

Organic Plums

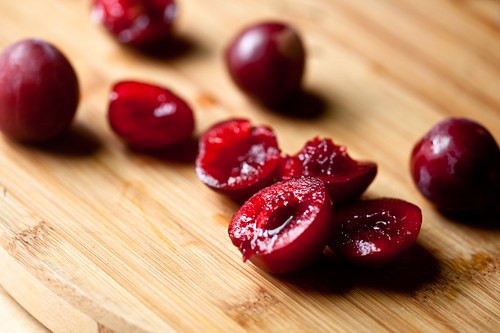
Here’s the thing. The plums themselves are very sweet, but I noticed a mild bitterness in the skins, even when I ate them fresh. After baking, the bitterness intensified. It’s not necessarily a bad thing, it’s similar to the bitterness of marmalade. If you really love the combination of sweet and bitter in a fruit, then go for the plums. If you’re not sure, choose another stone fruit; peaches or cherries would be completely divine in this. On second thought, I think nearly any bake-able fruit would be great.

Because this is a yeast-risen cake, it does take a while. Two hours for the first rise and ninety minutes for the second rise means this isn’t a fast dessert. If you’re looking for a quick coffee cake, try this crumb cake instead. But the flavor and texture of this kuchen really make all the time worthwhile.

Plum Kuchen (adapted from Gourmet Magazine, Aug 2009)
Makes One 9×9 Cake

1 Packet Active-Dry Yeast (2 1/4 tsp)
1/4 Cup Warm Water (105-110º F)
2 Cups plus 2 Tbs All-Purpose Flour, divided
1 Cup Sugar, divided
1/2 tsp Salt
1/2 Cup plus 1 Tbs Tofutti Sour Cream (or plain vegan yogurt)
2 tsp Ener-G Egg Replacer Powder mixed with 3 Tbs Hot Water
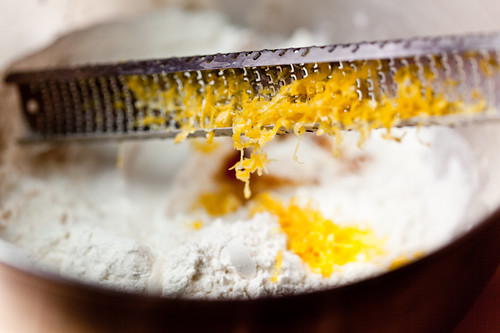
1 1/2 tsp Fresh Lemon Zest
1 tsp Vanilla Extract
1/2 cup plus 2 Tbs Earth Balance Margarine, divided
3/4 lbs Firm-Ripe Plums or other Stone Fruit, halved and pitted

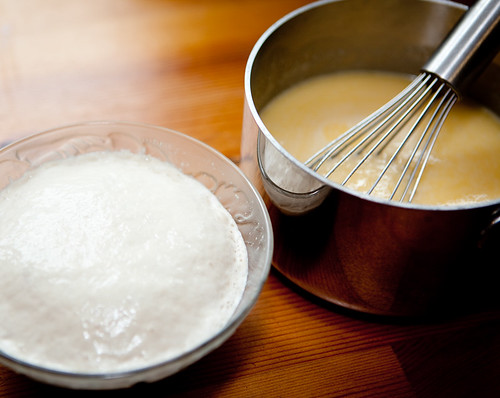
Combine the yeast with the warm water and set aside to proof until foamy.

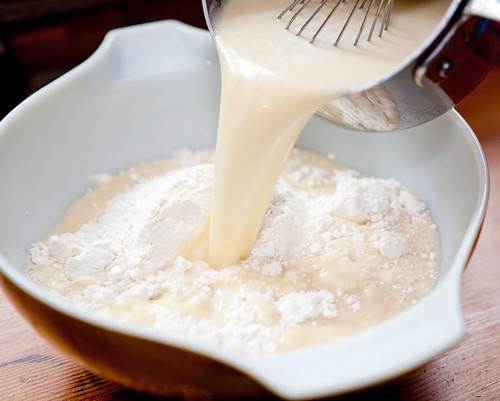
In a mixing bowl (one that fits in a stand mixer, if you have one), combine the yeast with 2 cups flour, 2/3 cup sugar, salt, sour cream, egg replacer, lemon zest, and vanilla extract.

Lemon Zest

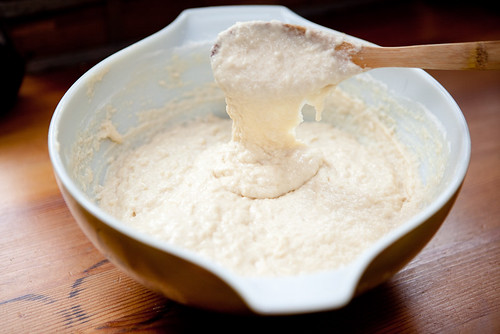
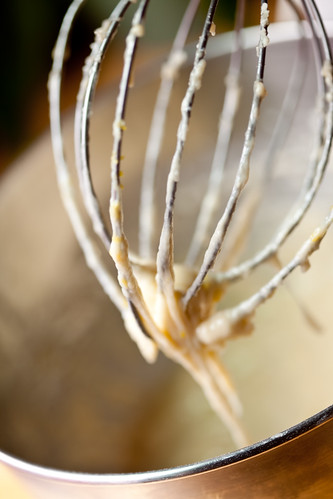
Beat at low speed to combine the ingredients, then mix at medium speed for 5 minutes while adding in 1/2 cup of Earth Balance, one tablespoon at a time. Beat the batter for five minutes at medium speed until smooth and shiny, and very sticky.

Batter

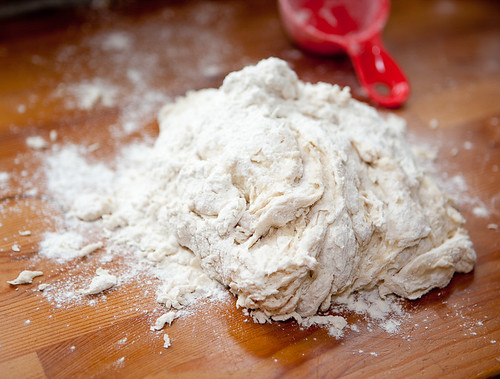
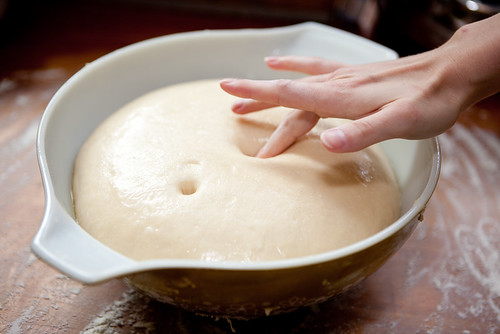
After five minutes, remove the bowl from the mixer and top with the remaining 2 Tbs of flour. Do not mix it in. Cover the bowl with a non-terry cloth kitchen towel and set aside to rise for 90 minutes to 2 hours.

After the first rise, mix the the dough to combine the flour on the top.

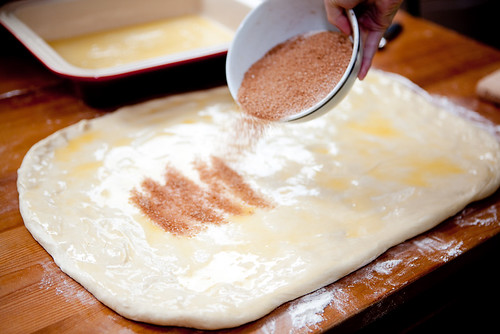
With the remaining 2 tablespoons of Earth Balance, grease a 9×9 cake pan. Sprinkle the remaining 1/3 cup sugar in the bottom of the pan.

Halve and pit the plums. It may be easier to cut around the pits, rather than to pull them out, if your fruit is very ripe.

Organic Plums

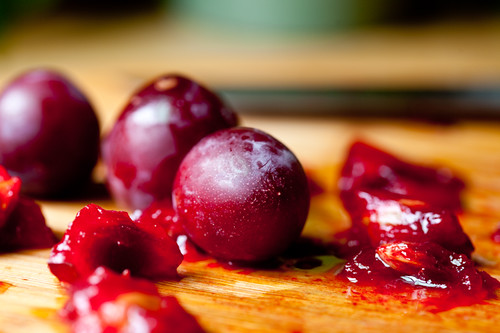
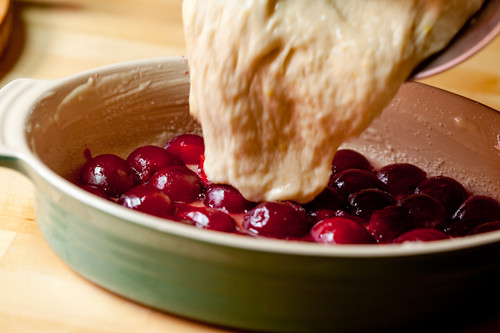
Slice the pitted plum halves into five or six slices. I left mine whole because they were very small. Place cut-side down into the sugar, covering the bottom of the pan.

Plum Kuchen, plums

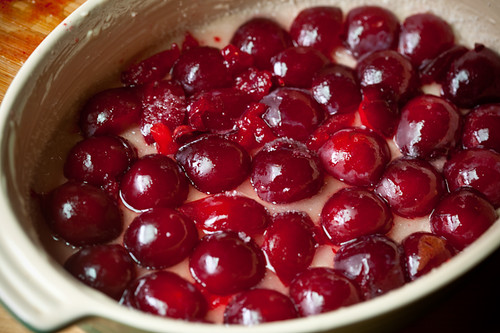
Pour the dough over the plums and let raise for another 90 minutes, covered with oiled plastic wrap.

Plum Kuchen, batter

Preheat oven to 375º F.

Bake the kuchen for 35 minutes, until evenly golden and slightly cracked.

Plum Kuchen

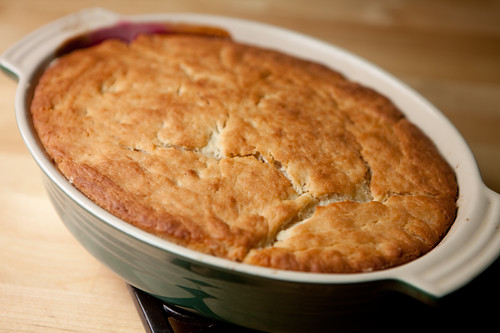
Remove from oven and let rest for 5 minutes. Loosen edges with a knife and turn out onto a rack to cool completely before serving.

Plum Kuchen

79 comments July 29th, 2009

Perfect Cinnamon Buns

Cinnamon Buns with Cream Cheese Frosting

I adore this recipe.

When I went vegan a little over five years ago, I had a minor panic attack when I realized I’d never eat another Cinnabon again. I remember I used to ask my dad to bring them home from the airport for me when I was little, whenever he had a business trip. The fluffy swirls of dough, the sugary syrup, the cream cheese frosting… I needed to recreate them perfectly, vegan style. And let me tell you, these are a dead ringer for our mall and airport favorites.

Cinnamon Buns with Cream Cheese FrostingBut it comes at a price. If you’re looking for a healthy, low-fat, calorie conscious treat, I can’t help you today. If you’re looking for a recipe that is guaranteed to win over any vegan doubter, guaranteed to please any Cinnabon lover, guaranteed to send any child into a permanent sugar high; these buns are for you.

There is a lot of sugar and Earth Balance margarine in these. But hey, the recipe makes a ton of rolls, and it takes four hours to make, so they’re really special occasion buns. Embrace the cups (and cups) of sugar and fat, and you will definitely be rewarded with the most perfect cinnamon bun you’ve ever had. Isn’t it worth it, at least once?

I think so.

For those of you who haven’t yet overcome your apprehension about yeast breads, I encourage you to give these a try. I’ve included tons of photos and a video to clarify the process and give you an idea how the dough is supposed to look at every step. They might seem intimidating, but they’re easier than you think!

I think these would be an amazing way to wake up Mom on Sunday, paired with a nice hot cup of coffee. You can make these ahead of time, refrigerating over night before the second rise and popping them in the oven in the morning, or you can freeze them for later. More info on that at the end of the recipe.

Perfect Cinnamon Buns
Makes 12 Large Buns

Yeast Mixture
4 tsp Active Dry Yeast (a little less than 2 packets)
1 tsp Sugar
1 Cup Water, 110º F

Dough
1 Cup Soymilk
2/3 Cup Sugar
2/3 Cup Earth Balance Margarine
2 tsp Salt
2 Ener-g Egg Replacer Eggs, prepared, optional
Yeast Mixture, from above
6 Cups All Purpose Flour, more for kneading

Dough Filling
1/2 Cup Earth Balance Margarine, melted
1 1/2 Cups Sugar
3 Tbs Cinnamon

Pan Sauce
1/2 Cup Earth Balance Margarine, melted
1/3 Cup Sugar

Cream Cheese Frosting
1/4 Cup Earth Balance
1/3 Cup Tofutti Better Than Cream Cheese
1 tsp Vanilla Extract
1 Cup Powdered Sugar

Combine yeast mixture and set aside to proof.

From the dough ingredients, combine the soymilk, sugar, earth balance, salt, and ener-g eggs in a small sauce pan. Heat until earth balance is melted and all the ingredients are well combined, but do not let the mixture get too hot. You should be able to put a finger in it without burning yourself.

The yeast should now be nice and foamy (proofed). Combine it with the warmed liquid you just made; make sure it’s not too hot, or you will kill your yeast.

Proofed Yeast and Liquid Ingredients

Place 4 cups of all purpose flour in a large bowl. Add the warmed wet ingredients.

Mixing the Dough

Beat the batter well with a wooden spoon. The dough will be very wet and liquid, much more like a batter than a dough.

Mixing the Dough

Add 2 more cups of flour and mix in partially. It’ll look like a wreck. That’s fine! Turn out the dough onto a large table/kneading surface, scraping out everything in the bowl.

Dough

Begin kneading, gently at first. It’s going to take about 8 minutes to get the dough where it needs to be. Add more flour only if the dough starts sticking to the table and there is no more dry flour to be worked into the dough. You want the dough to end up smooth and elastic, and slightly tacky, but not sticky. You should be able to knead it on a bare table without it sticking.

Here is a video of the kneading and cutting process, so you can see the stages the dough goes through.

Cinnamon Buns

Once the dough is ready, place it in an oiled bowl, covered with oiled plastic wrap, to rise for 90 minutes in a warm spot. If you’re lacking a warm spot, turn your oven on low for 1 minute, then turn it off and place the dough in the oven to rise with the door closed. Remember to turn the oven off after one minute, and remember the dough is in there — no preheating for other things! (I’ve made that mistake more than once, it’s never good.)

Once the dough has risen completely, it’ll leave a little dent when you poke it. If it springs back, it needs more time.

Risen Dough

Turn the dough out onto a floured surface and press it down (this is part is in the video above). You want it press or roll it out into a 15 x 20 inch rectangle. You can use a roller if you want, but it’s not necessary.

Pour the 1/2 cup of melted earth balance on the dough. Brush it so the dough is covered completely. It’s okay if it pools in some locations.

Mix together the cinnamon and sugar from the dough filling above. Sprinkle it evenly over the dough.

Cinnamon Sugar Filling

Prepare a large baking dish, like a lasagna dish, by pouring in the melted earth balance from the pan sauce ingredients above. Brush the sides of the pan so they are greased.

Melted Earth Balance

Add the sugar, spreading evenly over the bottom of pan. The pan is now ready for the buns.

The following steps are shown in detail in the video above: Roll the dough up gently, starting from one of the short sides. Let it rest on the seem once it’s rolled up completely. Cut 12 rolls with dental floss or sewing thread. Place the rolls in the pan. (Ignore the fact that they are practically floating in earth balance and sugar.)

Cinnamon Buns, pre-baked

Cover the buns and let rise for 45 minutes if you will be baking these immediately. If baking the next day, cover the buns and let rise in the refrigerator overnight. Bake in the morning with no need for more rising. If making the buns for a date in the future, cover the buns and freeze immediately. The day before you are ready to use them, defrost in the refrigerator overnight, then let warm up on the counter the next morning for an hour. In any case, when ready to bake, follow the directions below.

Preheat the oven to 350º F, remembering to remove the rising buns if they are in there!

Bake for 25-30 minutes, or until golden brown and bubbly. Let cool for a few minutes.

Cinnamon Buns, baked

Stir together the frosting ingredients. It takes a bit of elbow grease to mix it together, but resist the urge to add liquid. It will come together, I promise. Whisk until there are no lumps.

Serve the buns warm with frosting. I like to microwave completely cooled buns for 45-60 seconds before eating.

Happy Mother’s Day!

Cinnamon Buns with Cream Cheese Frosting

124 comments May 8th, 2009

Graham Crackers (and Dandies!)

S'mores with Homemade Graham Crackers and Dandies

I always have trouble finding vegan graham crackers at the store. Nearly every single brand has honey in them. The one version that doesn’t is full of icky ingredients.

When I got my Dandies in the mail, I knew I had to make my own graham crackers once and for all. The recipe turned out really good. I’d like to perfect the texture a little (ideally, I’d actually like them to be more crumbly than they are), but the flavor is nice and mellow, and it really highlights the sweet, nutty taste of whole wheat without being overly sugary. If you like your graham crackers really sweet, add a bit more sugar than I call for.

Graham CrackersGraham crackers are traditionally made with graham flour, named after Sylvester Graham, a really interesting (if slightly crazy) health nut from the 19th century. He promoted the vegetarian diet (yay!) to cure, among other things, sexual desires (I did say he was slightly crazy).

Graham flour is whole wheat flour. What makes it different from standard whole wheat is the ratio of endosperm to bran to germ. Sylvester Graham ground these parts of the wheat berry separately to preserve texture and then re-combined them in a specific proportion. You can find graham flour in some stores and online, or you can make your own. Wikipedia says “one cup of graham flour is approximately equivalent to 84 g (~2/3 cup) white flour, 15 g (slightly less than 1/3 cup) wheat bran, and 2.5 g (1.5 teaspoons) wheat germ.”

Or you can do what I did and just use stoneground flour and call it a day.

Stoneground Whole Wheat FlourActually, you can use whatever flour you like for these. I used stoneground flour because it has little flecks of bran in it, which adds some lovely texture to the crackers. I really recommend using at least some form of whole wheat, because it gives the graham crackers their traditional nutty flavor. Oh yeah, and it’s healthier. And rest assured it won’t mess with your libido. Sorry Sylvester.

Graham crackers are tasty, but they aren’t the sexiest food in the world. S’mores, on the other hand? Sexy. I made these with Chicago Soydairy’s latest vegan treat, Dandies vegan marshmallows. They are awesome! It’s my understanding that they’re being sold online, but sell out FAST. So if you see them available, scoop them up! They taste great, and they’re gelatin free, and they roast up just like the non-vegan version. Perfect for s’mores.

How about a little video before the recipe? Don’t forget all my videos are HD, so you can watch them full-screen!


Making Graham Crackers on Vimeo.

Graham Crackers
Makes at least 24 3×3″ Crackers

2 1/2 Cups Graham Flour or Stoneground Flour or Whole Wheat Flour
1 Cup All Purpose Flour
1/2 tsp Baking Powder
1 tsp Salt
1 tsp Cinnamon
1/2 Cup Earth Balance Margarine
1/4 Cup Dark Brown Sugar
1 tsp Vanilla Extract
1/4 Cup Agave Nectar (or a little more sugar mixed with water)
3/4 Cup Water

Mix the all the dry ingredients together. Cream together Earth Balance and sugar. Add vanilla and agave and beat with a whisk until smooth. Add a little of the flour and a little of the water to the earth balance/sugar mixture and combine. Continue adding in flour and water, a little at a time, until all flour and water is added. Work the dough with your hands until everything is evenly combined.

Divide dough in half and cover. Let rest for 30 minutes at room temperature.

Preheat oven to 325º F. Roll out the dough into a rectangle that measures approximately 11″x15″. Trim edges. Using a knife or a pizza cutter, cut the dough into squares or rectangles (I cut mine into 3′x3′ squares). Prick the squares with a fork.

Bake for 30-40 minutes at 325º F or until the crackers are turning golden brown around the edges. You can sprinkle cinnamon and sugar on top of the crackers during the last 10 minutes of baking if you like.

Remove from the baking sheet and let cool on a wire rack. See the video above for visual directions.

For S’mores

S'mores with Homemade Graham Crackers and Dandies

Place the crackers in multiples of two on a baking sheet and preheat the oven to broil. Add chocolate to one cracker and vegan marshmallows to another until all the crackers are topped. Broil for less than 1 minute, watching constantly, until the marshmallows are golden and melty and the chocolate has softened.

Chicago Soydairy's Dandies Marshmallows

Remove from oven, assemble the s’more, and eat! The graham crackers are also great plain, or topped with cream cheese frosting.

Graham Crackers

71 comments April 15th, 2009

Apple Pie Coffee Cake

Apple Pie Coffee Cake

I have a knack for inventing things that have already been invented. I made my husband an apple pie for his birthday, and was reminded how annoying it is to peel, core, and chop a lot of apples. But I really like pies made with fresh fruit, so it’s not a process I’m planning on giving up anytime soon.

Apple Pie Coffee CakeI went ahead and bought a jar of apple pie filling anyway, just in case I wanted to make a quicker pie with it, or do something else. I thought it might be really brilliant to use the filling in a coffee cake, and hey! It turns out there are lots of other brilliant people out there who have thought the same exact thing.

But my coffee cake is vegan, so nanner nanner boo boo! It’s also really quick and easy to put together, so it’s perfect for that lazy Sunday morning-turned-afternoon baking project.

Let this cake cool for a bit before cutting and you’ll be surprised how easy it is to serve; the cake holds up really well and doesn’t fall apart when slicing. It would be really nice served with a little scoop of vegan ice cream.

Apple Pie Coffee Cake
Makes 1 Cake

2 1/2 Cups Flour
1 Cup Granulated Sugar
1 tsp Baking Powder
3/4 tsp Salt*
1/2 tsp Cinnamon
2/3 Cup Canola Oil, or 2/3 Cup Earth Balance Margarine, softened
2/3 Cup Soymilk + 2 tsp Apple Cider Vinegar (or lemon juice)
2 Tbs Cornstarch mixed with 1/2 Cup Water
2 tsp Vanilla Extract
1 20 to 25 oz Jar Apple Pie Filling
1 Tbs Sugar mixed with 1 tsp Cinnamon, for topping.

*Reduce salt to 1/2 tsp if using Earth Balance.

Preheat oven to 350º F.

Combine all the dry ingredients of the cake and mix well. Add all of the liquid ingredients and fold the batter until just combined. The batter should be thick and nearly dough-like, as this will prevent the filling from sinking to the bottom of the pan.

Spread 1/2 of the batter in the bottom of a 9×11″ (or whatever) greased baking dish.

Assembling

Add apple pie filling evenly over the top.

Assembling

Spoon the rest of the batter over the top in clumps, leaving some of the apple filling showing through.

Assembling

Sprinkle with cinnamon sugar mixture.

Cinnamon Sugar Topping

Bake for 80 to 90 minutes or until a tester comes out clean. Be sure not to under bake. You may wish to cover the coffee cake with aluminum foil for the last 20-30 minutes to prevent over-browning.

Remove coffee cake from oven and let cool before serving. It’s just as good or better the next day.

——-
Gab Gab Gab

Stephen Metcalf endorses VeganYumYum on his podcast, Slate’s Culture Gabfest! Listen to it here, or subscribe via iTunes. It’s a fabulous podcast and I’m thrilled to get mention. Thanks Stephen!

Apple Pie Coffee Cake

78 comments April 8th, 2009

Daifuku

Daifuku

I first encountered daifuku at one of my favorite restaurants in Western Massachusetts, Fresh Side. In their deli case were these cute little white and green pillow-looking desserts, sitting behind a hand-written card that said: Mochi (vegan).

I ordered one and when I bit into it, it was such a surprise. First, the texture! It’s like a dense marshmallow, chewy and soft. Sweet, but not overwhelmingly so. Next, the filling. Beans. Beans? Beans. This particular mochi was fillied with a sweetened red bean paste, also called anko, and I think it was the first time I had ever had sweet beans. And it was really good!

Now, if I understand correctly, mochi is a catch-all term for a sweet dessert made with glutenous rice flour dough. It can be baked, wrapped around ice cream, eaten plain, or filled. Filled mochi, like the ones I’m blogging about today, are called daifuku.

Anko is one of the most common fillings, but many people also use berries. Strawberry filled ones are very popular in the spring, and they’re called ichigo daifuku. Whole raspberries also work, and sometimes people include a white sweetened bean paste (as opposed to red) known as shiroan.

Daifuku

Now what if I told you that I made these in the microwave?

I know!

Really.

I was skeptical, too. The microwave in my house is pretty much reserved for reheating leftovers. When I decided to make these, I was sort of shocked that all the recipes online called for nuking the dough. What’s more, they were pretty unclear about how to tell when you’re dough is ready. Microwaves seem to vary so much in power, 3 minutes in one microwave is very different than 3 minutes in another. But I decided to give it a go, and not only did it work, but it was really, really easy. If you are able to find pre-made red bean paste, you can make this whole recipe with only a microwave and just a few minutes.

So not only do you not need a kitchen for these (hello dorm-living vegans!), they’re also gluten free (hi celiacs!), soy free (hi soy…allergic lovelies!), fast (hi lazy people!), customizable (hi picky people!), and did I mention CUTE? Traditional colors are white, green, and pink, but food coloring isn’t required if it grosses you out. Matcha (green tea powder) is a natural and delicious flavoring that makes the mochi green.

MochikoNow the one thing you absolutely need, no substitutions, is mochiko. It’s glutenous rice flour, and no other flour will work for this. You can find it easily at any asian market.

Also make sure you have some cornstarch or potato starch handy, the dough is very sticky!

Daifuku
Makes 10-12 Filled Cakes

1 Cup Mochiko
1/4 Cup Sugar
2/3 Cup Water
2-3 Drops red or green food coloring, optional
Cornstarch or Potato Starch, for dusting

Filling Ideas
Anko (store bought or recipe below)
Strawberries
Raspberries

Anko
Makes enough for 3-4 batches of daifuku

1 14 oz Can Adzuki Beans
1/2 Cup Water
1 Cup Sugar
1 Tbs Vegetable Oil
1-2 Pinches Salt

Heat water and sugar separately until boiling and sugar is dissolved, turn off heat. Drain and rinse beans.

Adzuki Beans

Add to a pan and mash. Add 1/3 cup of the simple syrup you just made, along with salt and vegetable oil, and mash over medium heat. Beans will thicken and become slightly glossy. Add more syrup if desired. Turn out into a bowl and let cool.

Making the Mochi

Add the mochiko, sugar, water, and food coloring (if using) to a microwave safe bowl. Stir well, making sure there are no lumps. Scrape down the sides of the bowl as best you can with a rubber spatula, otherwise they’ll get all gross when the dough is microwaved.

Daifuku Dough

Cover lightly with plastic wrap and mircowave for 2 minutes. Remove bowl from the microwave and stir VERY well. Dough will be much thicker, but there should still be some raw parts underneath. I like to use a sturdy silicone spatula to mix the dough at this point. Place the dough back in the microwave for 1 more minute.

Open the door and peek–did the dough start sinking as soon as the door opened? If so, the dough was inflating while cooking, which means it’s ready. If not, microwave for 1 more minute and check again. You shouldn’t have to microwave for more than 4 minutes total (2 minutes initial cooking, 2 more additional minutes after mixing).

One the dough deflates when you open the door, remove the dough from the microwave and scrape it out onto a cornstarch-coated cutting board.

Daifuku Dough

Pat the hot dough (be careful! It’s hot!) with cornstarch and flatten it out a little. Cut into 10-12 even pieces. Add 1 tsp of filling to each piece and gently press the edges together to seal.

Making Daifuku

Here’s the whole process in a little HD video for you to watch! No sound, so don’t worry about turning down the volume if you’re at work. The video starts right after I took the dough out of the mircowave and dumped it onto the cutting board.


Making Daifuku on Vimeo.

The best way to keep these fresh is to individually wrap them in plastic wrap and then refrigerate. If you leave them out, unwrapped, they’ll get dry and tough. Enjoy!

Daifuku with Anko Filling

129 comments March 4th, 2009

Previous Posts


Get the VYY book!

VYY on your iPhone

Click for the FREE app.

Knit Night Cupcakes

Knit Night Cupcakes - Yarn Balls If you're looking for the Knit Night Cupcakes that were featured on the Martha Stewart Show, the original post is here!

Email me at lolo AT veganyumyum DOT com

Fun Stuff

  • VeganYumYum Reader Flickr Pool
  • My Amazon.com Wish List
  • Calendar

    September 2010
    M T W T F S S
    « Jan    
     12345
    6789101112
    13141516171819
    20212223242526
    27282930  

    Posts by Month

    Posts by Category