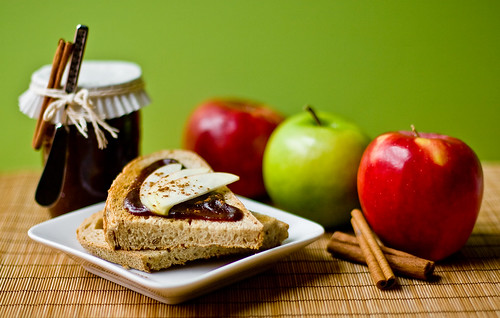
Homemade Apple Butter
So basically, my crock pot hates me.
It’s supposed to be one of the easiest appliances to use, right? Everytime I’ve tried to something has gone wrong. Things are either over cooked or undercooked, and definitely not very tasty. I decided I needed to find a recipe that couldn’t possibly fail. When I realized I had 5 pounds of apples, I had my answer.
I found a recipe for crock pot apple butter, and it seemed super easy. Peel and chop the apples, add sugar and spices, let cook overnight. I could do that. My crock pot could do that.
It turns out peeling and chopping 5 1/2 pounds of apples is kind of a pain in the a…pple. Your hands get all slippery and tired, and you get sticky apple juice everywhere. Then the apples didn’t fit into my crockpot, so I had to puree them all in order to make the most of the space I had. Finally I got everything in the crock pot and turned it on. The recipe said the whole thing would take less than 12 hours. Great!
12 hours later? Not even close to done.
I ended up cooking this apple butter for a full 24 hours. Between prepping, cooking, and canning, the whole project took 26 hours! 26! A lot of that was downtime, but still. My crock pot is cursed.
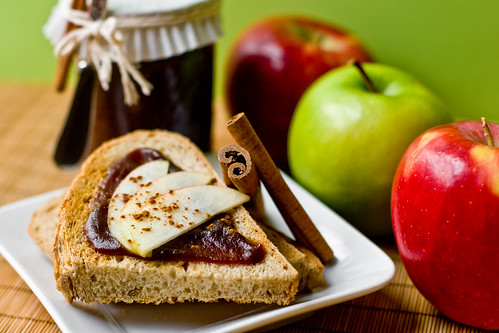
It was so worth it though. It’s dark, sweet, tangy, silky, and spicy. It is SO GOOD on toast with a little vegan margarine, you have no idea. It’s like concentrated apple pie. I wish you could taste it. Well, actually, you might be able to!
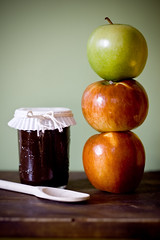
Since I have a lot of this stuff, and it’s such a b…anana to make, I’m going to give away three jars to VeganYumYum readers. Yay!
Win Homemade Organic Apple Butter!
Contest is closed! Stay tuned for the winners!
 1) Comment!
2) Use a valid email address! (Will not be published!)
3) Win apple butter!
In one week (November 11th at 5 PM), I’ll use a random number generator to pick three numbers, corresponding to the comments here. Those people win a 1/2 pint jar of organic apple butter, complete with fun spreader knife and recipe card. I’ll email you to tell you you’ve won: just reply with a mailing address.
Some general rules: If you don’t leave a valid email address with your comment, I’ll pick another person. If I don’t hear back from you with your mailing address, I’ll pick another person. I’ll ship overseas, so don’t worry, everyone can play!
For those of you who don’t win, here’s the recipe. I used this recipe found I online.
Crock Pot Apple Butter
Makes 4 Pints
5 1/2 lbs Apples, peeled and finely chopped (as many different kinds as you can!)
4 Cups Sugar
2-3 tsp Cinnamon
1/4 tsp Ground Cloves
1/4 tsp Salt
1 Sprinkle Nutmeg
Peel and core the apples. Slice finely or puree in a food processor. Add apples and remaining ingredients to your crock pot. Cook on high for 1 hour, then on low for 8-10 hours. Remove lid (or crack it open a bit) and cook on high until a wooden spoon stands upright in it. The apple butter will have reduced by about half to get to this point. Blend if desired.
Fill sterilized jars with simmering apple butter and process for 15 minutes in a boiling-water bath. Remove jars and let sit, undisturbed, overnight. Test the seals and refrigerate any jars that have not sealed completely. Fully sealed jars will keep for 18-24 months unopened. Once opened, the apple butter will keep for 2 months in the refrigerator, or indefinitely in the freezer.
Good luck!