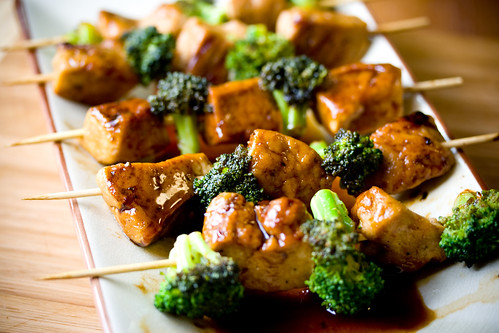
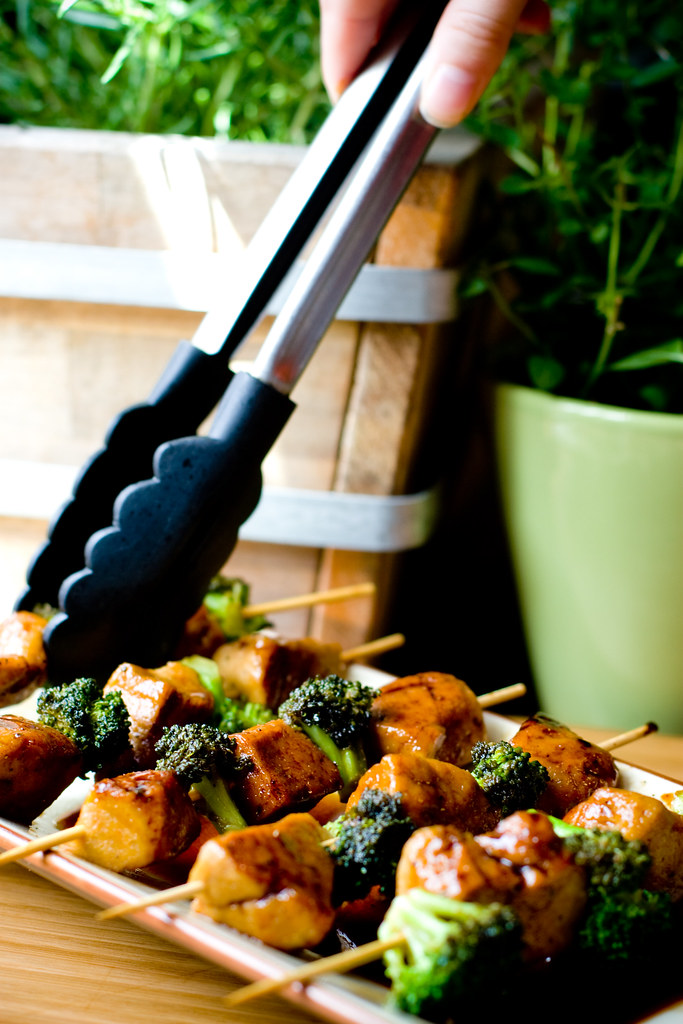
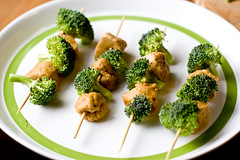
Tamarind Seitan Kabobs
Comments are working again, thanks for your patience!
Hello July!
I’ve been sitting on this tamarind glaze recipe for a while. It needed something summery, something involving a grill, and something you can eat with your hands.
It needed seitan kabobs!
Who doesn’t love a kabob? You can put anything you want on a kabob, and these are no exception. I made my own seitan chunks (based off of Susan’s Seitan Ribz from FFVK) and added some freshly blanched broccoli, but any veggie that floats your boat, tofu, store-bought seitan… if it’s vegan and you can poke it with a stick, it’ll probably work. Because this recipe? It’s all about the sauce.
I LOVE this sauce.
I used to have to drive to a specialty Indian grocer to get tamarind concentrate (I prefer it to the pulp, if you have a choice), but I recently saw it sitting at Whole Foods near the grilling sauces. The brand I use is called Tamicon, and it comes in a little yellow and red tub. It keeps forever. Buy some.
The base of this glaze is the tangy tamarind concentrate and sweet, sweet agave nectar (also available pretty much everywhere nowadays, near the honey). I give it a little depth with tamari, and some spicey notes with cumin and ginger. It’s awesome. And if you have a whisk, or a fork for that matter, you can make it.
Tamarind Seitan Kabobs
Makes 10 Kabobs (3 Pieces of Seitan Per Kabob)
1 Recipe Seitan, below
1 Recipe Tamarind Glaze, below
20 Broccoli Florets, or 20 Veggie Pieces, your choice
Wooden Skewers, with pointy ends
Seitan Cubes
1 Cup Vital Wheat Gluten
2 tsp Smoked Paprika
2 Tbs Nutritional Yeast
2 tsp Bill’s Best Chik’Nish Seasoning, optional
3/4 Cup Water
2 Tbs Olive Oil
1 Tbs Soy Sauce
Vegetable Stock, for simmering
Tamarind Glaze
1 Tbs Tamarind Concentrate
1/4 Cup Agave Nectar
1 Tbs Tamari or Soy Sauce
1/2 tsp Cumin
1/2 tsp Ginger
1/4 tsp Salt
1/2 tsp Molasses
Black Pepper
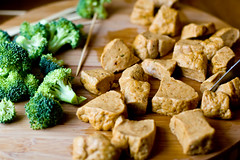 Begin by making the seitan. In a medium bowl, combine the gluten with the dry ingredients and mix well. Add the wet ingredients and knead for a few minutes. With a large knife, divide the seitan in half, and in half again. Continue to cut each piece in half until you have about 30 bite-sized chunks of seitan.
Place a large skillet (one that has sides) on the stove and fill with 1-2″ of vegetable stock. Bring to a simmer, then add the seitan cubes. The stock should be about level with the seitan, the same amount of liquid you’d use for braising. GENTLY simmer (no boiling allowed!) for 8-10 minutes. When the seitan chunks are done, they should be larger, paler, and springier than when you started. Remove the seitan chunks with a slotted spoon. Set them aside until they’re cool enough to handle.
Save the braising broth to blanch any vegetables you’ll be using on your kabobs.
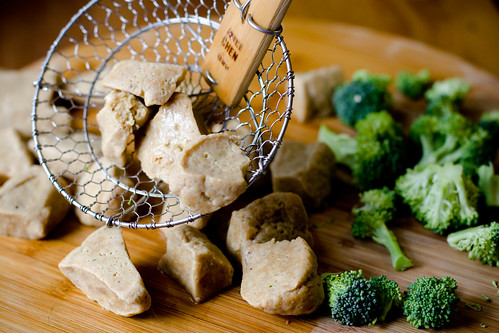
Blanch any veggies in the leftover broth and drain and set aside. Stir together your tamarind glaze and set aside.
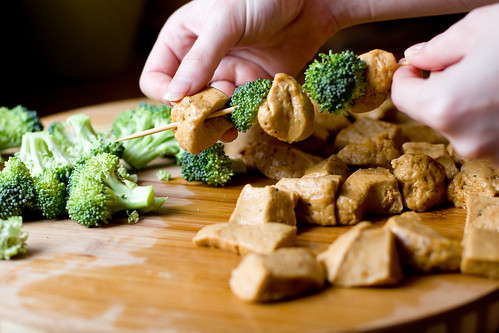
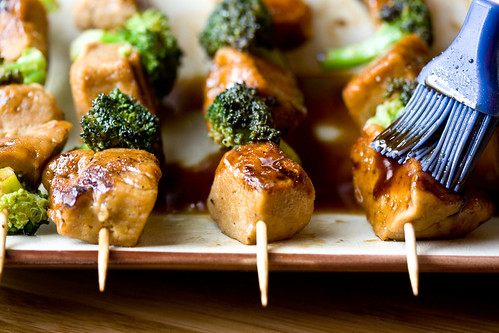
Begin assembling your kabobs. Be careful with smaller pieces of veggies (especially broccoli), as they’ll split and fall off the skewer if they’re not large enough. I like to alternate veggie/seitan/veggie, but it’s your kabob, so make it the way you want!
 At this point, you can refrigerate the assembled kabobs for later. Wrap them up and they’ll be ready for grilling whenever you (or your party guests!) are ready for them. Everything can be made a day ahead, even the sauce, so all you’ll need is a few minutes to grill before serving.
Speaking of the grill, here are a few tips:
If you’re grilling outside, soak the skewers in water for a few hours before assembling the kabobs. This will prevent them from, um, catching on fire. Larger pieces of veggies will stay on the skewers more securely Like all sweet glazes, be careful or they’ll burn! Add the glaze towards the end of grilling, not right away. This will work just as well in a grill pan inside.
Once you’re ready to grill, unwrap the kabobs and throw them on. Everything is already cooked, so you don’t need to worry about anything other than 1) heating the kabob up 2) getting some nice grill marks and 3) caramelizing the sauce a little. I failed at getting grill marks, but the kabobs were still pretty.
Grill for a minute or two on each side, then brush the sauce over the kabobs. When the sauce starts to sizzle and bubble, your kabobs are done. Serve immediately with lots of napkins.