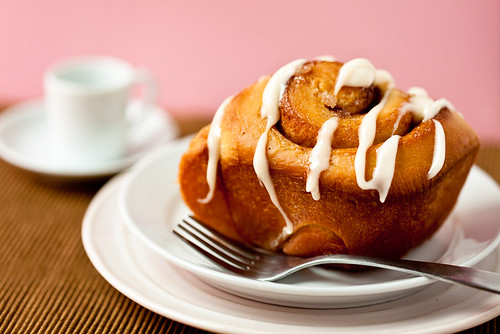
Perfect Cinnamon Buns
I adore this recipe.
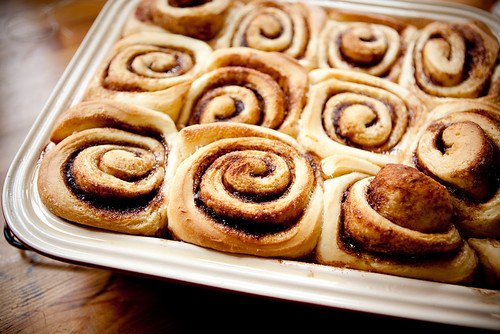
When I went vegan a little over five years ago, I had a minor panic attack when I realized I’d never eat another Cinnabon again. I remember I used to ask my dad to bring them home from the airport for me when I was little, whenever he had a business trip. The fluffy swirls of dough, the sugary syrup, the cream cheese frosting… I needed to recreate them perfectly, vegan style. And let me tell you, these are a dead ringer for our mall and airport favorites.
 But it comes at a price. If you’re looking for a healthy, low-fat, calorie conscious treat, I can’t help you today. If you’re looking for a recipe that is guaranteed to win over any vegan doubter, guaranteed to please any Cinnabon lover, guaranteed to send any child into a permanent sugar high; these buns are for you.
There is a lot of sugar and Earth Balance margarine in these. But hey, the recipe makes a ton of rolls, and it takes four hours to make, so they’re really special occasion buns. Embrace the cups (and cups) of sugar and fat, and you will definitely be rewarded with the most perfect cinnamon bun you’ve ever had. Isn’t it worth it, at least once?
I think so.
For those of you who haven’t yet overcome your apprehension about yeast breads, I encourage you to give these a try. I’ve included tons of photos and a video to clarify the process and give you an idea how the dough is supposed to look at every step. They might seem intimidating, but they’re easier than you think!
I think these would be an amazing way to wake up Mom on Sunday, paired with a nice hot cup of coffee. You can make these ahead of time, refrigerating over night before the second rise and popping them in the oven in the morning, or you can freeze them for later. More info on that at the end of the recipe.
Perfect Cinnamon Buns
Makes 12 Large Buns
Yeast Mixture
4 tsp Active Dry Yeast (a little less than 2 packets)
1 tsp Sugar
1 Cup Water, 110º F
Dough
1 Cup Soymilk
2/3 Cup Sugar
2/3 Cup Earth Balance Margarine
2 tsp Salt
2 Ener-g Egg Replacer Eggs, prepared, optional
Yeast Mixture, from above
6 Cups All Purpose Flour, more for kneading
Dough Filling
1/2 Cup Earth Balance Margarine, melted
1 1/2 Cups Sugar
3 Tbs Cinnamon
Pan Sauce
1/2 Cup Earth Balance Margarine, melted
1/3 Cup Sugar
Cream Cheese Frosting
1/4 Cup Earth Balance
1/3 Cup Tofutti Better Than Cream Cheese
1 tsp Vanilla Extract
1 Cup Powdered Sugar
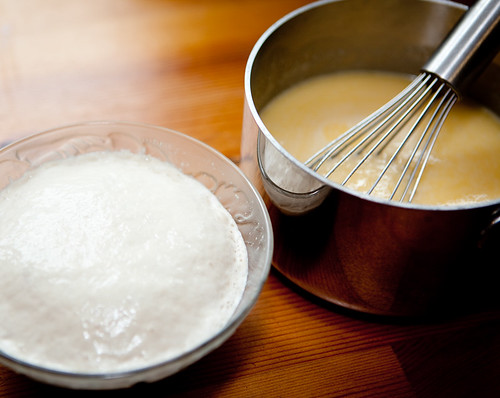
Combine yeast mixture and set aside to proof.
From the dough ingredients, combine the soymilk, sugar, earth balance, salt, and ener-g eggs in a small sauce pan. Heat until earth balance is melted and all the ingredients are well combined, but do not let the mixture get too hot. You should be able to put a finger in it without burning yourself.
The yeast should now be nice and foamy (proofed). Combine it with the warmed liquid you just made; make sure it’s not too hot, or you will kill your yeast.
Place 4 cups of all purpose flour in a large bowl. Add the warmed wet ingredients.
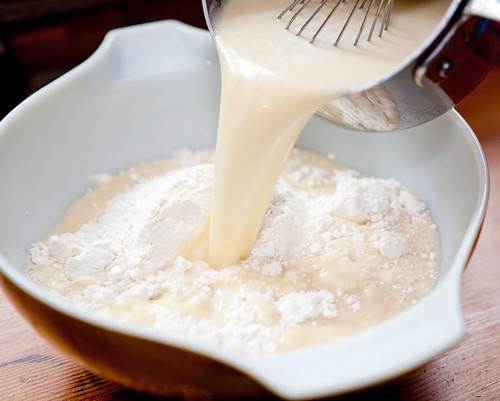
Beat the batter well with a wooden spoon. The dough will be very wet and liquid, much more like a batter than a dough.
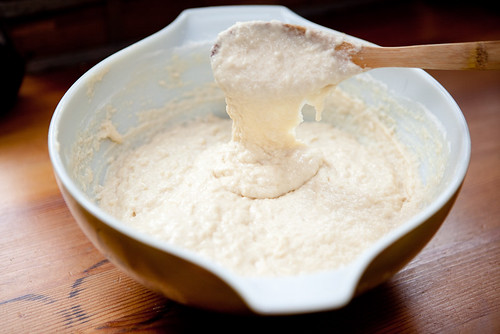
Add 2 more cups of flour and mix in partially. It’ll look like a wreck. That’s fine! Turn out the dough onto a large table/kneading surface, scraping out everything in the bowl.
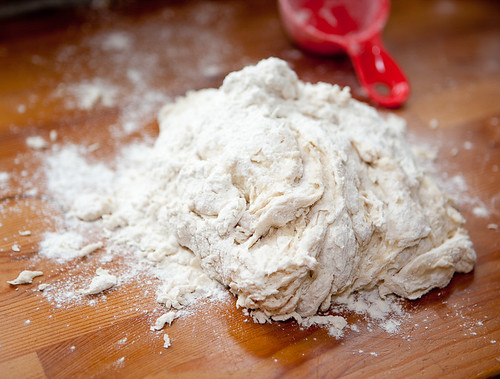
Begin kneading, gently at first. It’s going to take about 8 minutes to get the dough where it needs to be. Add more flour only if the dough starts sticking to the table and there is no more dry flour to be worked into the dough. You want the dough to end up smooth and elastic, and slightly tacky, but not sticky. You should be able to knead it on a bare table without it sticking.
Here is a video of the kneading and cutting process, so you can see the stages the dough goes through.
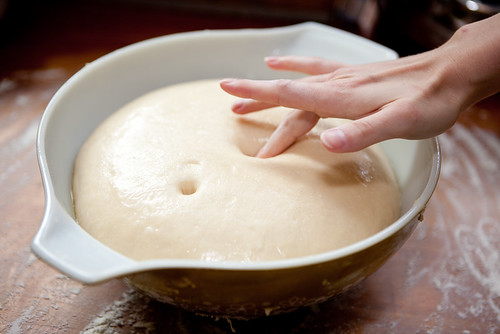
Once the dough is ready, place it in an oiled bowl, covered with oiled plastic wrap, to rise for 90 minutes in a warm spot. If you’re lacking a warm spot, turn your oven on low for 1 minute, then turn it off and place the dough in the oven to rise with the door closed. Remember to turn the oven off after one minute, and remember the dough is in there — no preheating for other things! (I’ve made that mistake more than once, it’s never good.)
Once the dough has risen completely, it’ll leave a little dent when you poke it. If it springs back, it needs more time.
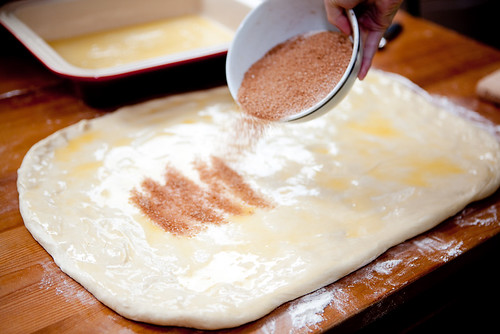
Turn the dough out onto a floured surface and press it down (this is part is in the video above). You want it press or roll it out into a 15 x 20 inch rectangle. You can use a roller if you want, but it’s not necessary.
Pour the 1/2 cup of melted earth balance on the dough. Brush it so the dough is covered completely. It’s okay if it pools in some locations.
Mix together the cinnamon and sugar from the dough filling above. Sprinkle it evenly over the dough.
Prepare a large baking dish, like a lasagna dish, by pouring in the melted earth balance from the pan sauce ingredients above. Brush the sides of the pan so they are greased.
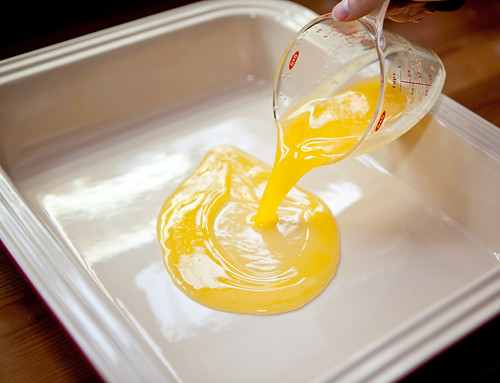
Add the sugar, spreading evenly over the bottom of pan. The pan is now ready for the buns.
The following steps are shown in detail in the video above: Roll the dough up gently, starting from one of the short sides. Let it rest on the seem once it’s rolled up completely. Cut 12 rolls with dental floss or sewing thread. Place the rolls in the pan. (Ignore the fact that they are practically floating in earth balance and sugar.)
Cover the buns and let rise for 45 minutes if you will be baking these immediately. If baking the next day, cover the buns and let rise in the refrigerator overnight. Bake in the morning with no need for more rising. If making the buns for a date in the future, cover the buns and freeze immediately. The day before you are ready to use them, defrost in the refrigerator overnight, then let warm up on the counter the next morning for an hour. In any case, when ready to bake, follow the directions below.
Preheat the oven to 350º F, remembering to remove the rising buns if they are in there!
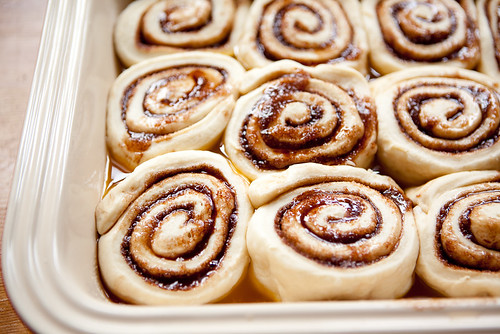
Bake for 25-30 minutes, or until golden brown and bubbly. Let cool for a few minutes.
Stir together the frosting ingredients. It takes a bit of elbow grease to mix it together, but resist the urge to add liquid. It will come together, I promise. Whisk until there are no lumps.
Serve the buns warm with frosting. I like to microwave completely cooled buns for 45-60 seconds before eating.
Happy Mother’s Day!